
Level up an outfit with this easy DIY using Swarovski crystals. If a top is not quite giving what you want, or you just fancy some extra sparkle for festival season, this step-by-step guide shows you how to bedazzle a top with flatback rhinestones, turning a plain piece into a one-of-a-kind statement.
The best part is how easy it is to personalise: change the colours, mix the crystal sizes, or pick out a neckline, sleeve or hem. Here is everything you need, then the full method.
Project at a glance
- Difficulty: Beginner
- Time: 1 to 2 hours, plus at least 12 hours to cure
- Crystals used: Swarovski flatbacks in Fuchsia SS20
- Best crystal type: Non-hotfix flatbacks, glue-set (works on any fabric, no heat needed)
Watch the tutorial
See this project come together. Watch the full make below, then scroll down for the kit list and step-by-step instructions.
What you'll need
Quantities suit a neckline accent, so scale them to your design. Add the crystals, glue and tools to your cart from the cards below. The picker, tweezers and tray are reusable across every project, so browse the full range of tools and accessories to build your kit.
- Top of your choiceYour base, clean and dry1
- Swarovski Non-Hotfix Flatbacks SS20, FuchsiaThe sparkle50
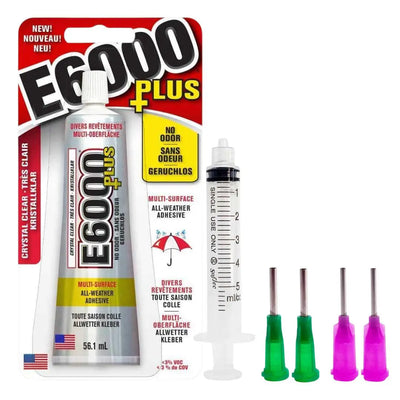
- E6000 Plus Glue KitAdhesive with syringe1
- Crystal Wax Picker PenPlacing crystals1
- Bent TweezersPositioning crystals1
- Magic Sorting TrayOrganising crystals1
Shop this project
Everything you need for this build. Quantities are a guide, so adjust to your design.

From £2.23 Excl. VAT

£1.95 Excl. VAT

£5.12 Excl. VAT
£9.53 Excl. VAT
Not sure how many crystals you need? Use our Crystal Calculator to estimate by surface area.
How to bedazzle a top
Step 1: Gather your supplies
Tip your flatbacks into the sorting tray so they are easy to reach, and make sure the tip of your wax picker is sharp, which makes lifting each crystal easier. Load your E6000 glue into the syringe ready to apply.
Step 2: Map out your design
Plan your placement before gluing. For a neckline, keep the crystals evenly spaced and in line with one another so the finished edge looks crisp rather than wonky. Laying a few out dry first makes this much easier to judge.
Step 3: Glue and place the crystals
Apply the E6000 glue a small section at a time. On fabric, use a little more than you would on a hard surface, as the material absorbs some of the glue and the crystals will not hold otherwise. Avoid overdoing it though, as excess glue looks messy. Place each flatback with the wax picker, nudging it true with the bent tweezers. SS20 suits this neckline; drop to a smaller size for finer or tighter areas.
Step 4: Inspect and adjust
Once your crystals are down, check your work and reposition any that need it before the glue sets. Keep the top lying as flat as possible while you work, so the flatbacks do not slide and dry at an angle.
Step 5: Leave to cure
Leave the top to dry flat for at least 12 hours so the bond fully sets before you wear it.
Where to buy genuine Swarovski crystals
As an Authorised Swarovski Distribution Partner, Bluestreak Crystals supplies the complete genuine range of Swarovski flatbacks, sourced directly from Austria with consistent batch quality, reliable colour matching and full lead-free compliance, so your top gets authentic sparkle that lasts.
Frequently asked questions
How do you put rhinestones on clothing?
Map your design out first, then glue flatback crystals on a section at a time with a flexible adhesive like E6000, pressing each one in with a wax picker. Fabric absorbs some glue, so apply a little more than you would on a hard surface, and let it cure fully.
What glue works best on fabric?
A flexible, washable-friendly adhesive such as E6000, or a dedicated fabric gem glue. Both stay flexible as the fabric moves so the crystals do not ping off. Because fabric soaks up some adhesive, use slightly more per stone than on plastic or metal.
Will the crystals survive washing?
Glue-set crystals are best treated as delicate. Turn the top inside out, hand wash gently in cool water and lay flat to dry. Avoid the machine, the tumble dryer and harsh detergents. For a garment you will wash often, heat-set hotfix crystals hold up better than glue.
Should I use hotfix or non-hotfix crystals on a top?
Both work. We glued non-hotfix flatbacks here, which suits any fabric and needs no heat, so it is ideal for delicate or synthetic tops. Hotfix crystals are iron-on and more wash-durable, but only on heat-safe fabrics. We also have a separate hotfix festival top guide if you prefer that method.
How many crystals do I need for a top?
It depends on your design. A neckline accent like this uses around 50 SS20 flatbacks, while full coverage of a panel needs many more. Use our Crystal Calculator to estimate by area before you buy.
Which crystals should I use?
We used premium Swarovski in Fuchsia SS20 here for a bold festival pop. You can also use our own Austrian-made Serinity, Czech-made Preciosa or budget Estella, and pick any colours that suit your outfit.
Make it your own
A neckline is just the start. Pick out cuffs, a collar, a hem or scatter crystals across a shoulder to build your own festival look. For the rest of the outfit, see our embellished denim shorts and festival boots projects, or explore the full Craft Studio.


