
Are you looking to add some extra sparkle to your favourite drinks bottle? This guide shows you how to bedazzle a Stanley cup with premium Swarovski non-hotfix flatback crystals, taking your tumbler from basic to brilliant. Hand-placed rhinestones shimmer with every move, whether you are at the gym, running errands or showing off your iced coffee.
It is an easy, beginner-friendly project, though a full-coverage cup takes some patience. Here is everything you need, then the full method.
Project at a glance
- Difficulty: Intermediate (large curved surface to cover)
- Time: Several hours over a session or two, plus at least 12 hours to cure
- Crystals used: Swarovski flatbacks in an icy blue of Sky Ignite and Montana, sizes SS3 to SS20
- Best crystal type: Non-hotfix flatbacks, glue-set to the cup
Watch the tutorial
See this project come together. Watch the full make below, then scroll down for the kit list and step-by-step instructions.
What you'll need
Quantities suit full coverage of a tumbler, so scale them to your cup and design. Add the crystals, glue and tools to your cart from the cards below. The picker and trays are reusable across every project, so browse the full range of tools and accessories to build your kit.
- Stanley cup or tumbler (your own)Your base, see note below1
- Swarovski Non-Hotfix Flatbacks SS20, Sky IgniteMain body coverage2880
- Swarovski Non-Hotfix Flatbacks SS12, Sky IgniteBody50
- Swarovski Non-Hotfix Flatbacks SS9, Sky IgniteLogo and detail50
- Swarovski Non-Hotfix Flatbacks SS7, Sky IgniteLogo and detail200
- Swarovski Non-Hotfix Flatbacks SS5, Sky IgniteLogo and detail50
- Swarovski Non-Hotfix Flatbacks SS7, MontanaLogo50
- Swarovski Non-Hotfix Flatbacks SS5, MontanaLogo50
- Swarovski Non-Hotfix Flatbacks SS3, MontanaLogo, finest detail50
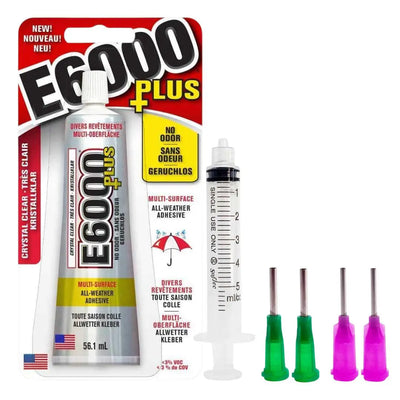
- E6000 Plus Glue KitAdhesive with syringe1
- Wax Crystal Picker PenPlacing crystals1
- Magic Sorting TrayOrganising sizes4
Shop this project
Everything you need for this build. Quantities are a guide, so adjust to your design.

From £2.23 Excl. VAT

From £2.23 Excl. VAT

£1.95 Excl. VAT
£9.53 Excl. VAT
Not sure how many crystals you need? Use our Crystal Calculator to estimate by surface area.
How to bedazzle a Stanley cup
Step 1: Gather your supplies and prepare the glue
Tip your flatbacks into the sorting trays. The bulk of the cup uses the SS20 crystals, so start with those and set the smaller sizes aside for the detail work later. Make sure the tip of your wax picker is sharp, then load your E6000 glue into the syringe.
Step 2: Apply the main coverage
Apply a thin layer of glue for your first row of crystals. Because the cup is round and slippery, wait around five to ten minutes for the glue to get tacky before placing the crystals so they do not slide. Work in rows around the body, and leave the Stanley logo area clear, as you will come back to it.
Step 3: Inspect and adjust
Before moving on to the smaller, detailed areas, check your work and straighten any crystals that are out of place or not glued down flat. It is much easier to fix now than after the detailed sections are done.
Step 4: Add the logo and fine detail
Now fill the logo area and any other spaces that need smaller crystals. For the logo, use Montana in SS3, SS5 and SS7, and Sky Ignite in SS5, SS7 and SS9. Apply a small layer of glue and place the crystals as before.
Step 5: Finishing touches
Once all your crystals are placed, adjust any that need it, then leave the cup to cure for at least 12 hours so the bond is fully set before you use it.
Where to buy genuine Swarovski crystals
As an Authorised Swarovski Distribution Partner, Bluestreak Crystals supplies the complete genuine range of Swarovski flatbacks, sourced directly from Austria with consistent batch quality, reliable colour matching and full lead-free compliance, so your tumbler sparkles with authentic brilliance.
Frequently asked questions
How do you bedazzle a Stanley cup?
Clean the cup, then glue flatback crystals on in rows around the body with a strong adhesive. Because the surface is round and slippery, let the glue go tacky before placing each crystal. Work the main colour first, leave the logo area, then fill the logo and detail spaces with smaller crystals, and cure before use.
What glue works on a stainless steel tumbler?
A flexible, industrial-strength adhesive like E6000. Clean and degrease the cup first, then apply a thin layer and wait around five to ten minutes for it to become tacky before pressing on each crystal, which stops them sliding on the smooth, curved metal.
Can you wash a bedazzled Stanley cup?
Hand wash only, gently, and avoid soaking it or putting it in the dishwasher, as prolonged water and heat will loosen the glue over time. Keep the crystals clear of the lip and mouthpiece so you never drink directly over them, and wipe rather than scrub the decorated area.
How do you apply crystals to a curved cup neatly?
Work in horizontal rows around the body so the lines stay even, starting with your main size and colour. Use the larger crystals for the broad surface and switch to smaller sizes for the logo, tapered base and any tight areas.
How many crystals do I need to cover a tumbler?
A full-coverage tumbler needs a lot: this design used around 2880 SS20 crystals for the body plus smaller sizes for the logo and detail. Use our Crystal Calculator to estimate by area before you buy, so you order enough in one batch for consistent colour.
Which crystals and colours should I use?
Non-hotfix, glue-set flatbacks, since heat is not suitable for an insulated cup. We used an icy blue of Sky Ignite and Montana, but any palette works. We used premium Swarovski; you can also use Czech-made Preciosa, our own Austrian-made Serinity, or budget Estella.
Make it your own
Try an ombre, a two-tone design or your initials, and match the colour to your style. For more drinkware sparkle, see our bedazzled water bottle and crystal coffee mug projects, or explore the full Craft Studio.


