

Want to turn a much loved character into a display piece that really sparkles? This guide shows you how to bedazzle Toy Story figures with Serinity non-hotfix flatback crystals, covering Jessie's hat and cuffs and Bullseye's saddle in hand placed rhinestones.
It is an advanced project, not because the technique is difficult but because the areas are small, curved and fiddly, so patience matters more than skill. Our own Austrian made Serinity crystals come in sizes right down to SS3, which is what lets you follow every tight contour cleanly. Here is everything you need, then the full method.
Project at a glance
- Difficulty: Advanced
- Time: 3 to 4 hours, plus 12 hours to dry
- Crystals used: Serinity 2058 flatbacks in Light Siam, Smoked Topaz and Jonquil
- Best crystal type: Non-hotfix flatbacks, glue-set to each figure
Watch the tutorial
See this project come together. Watch the full make below, then scroll down for the kit list and step-by-step instructions.
What you'll need
Quantities suit a hat, a saddle and a pair of cuffs, so scale them to your own figures. A retail pack holds 50 crystals and a wholesale pack 1,440, and the counts below are the approximate number of stones each section needs, around 5,000 in total. Add the crystals, glue and tools to your cart from the cards below. The picker and trays are reusable across every project, so browse the full range of tools and accessories to build your kit.
- Your figures, clean and dryThe bases, we used Jessie and Bullseye1 set
- Serinity 2058 Flatbacks SS5, Light SiamHat, main coverage2,880 (2 wholesale packs)
- Serinity 2058 Flatbacks SS3, Light SiamHat, closing tight gaps50 (1 retail pack)
- Serinity 2058 Flatbacks SS9, Smoked TopazSaddle, main coverage1,440 (1 wholesale pack)
- Serinity 2058 Flatbacks SS7, Smoked TopazSaddle, smaller spots50 (1 retail pack)
- Serinity 2058 Flatbacks SS5, Smoked TopazSaddle, smallest spots50 (1 retail pack)
- Serinity 2058 Flatbacks SS5, JonquilCuffs, main coverage450 (9 retail packs)
- Serinity 2058 Flatbacks SS7, JonquilCuffs, protruding sections50 (1 retail pack)
- Serinity 2058 Flatbacks SS9, JonquilCuffs, protruding sections50 (1 retail pack)
- E6000 Plus Glue KitAdhesive with syringe and tips1
- Wax Crystal Picker PenPlacing crystals1
- Magic Sorting TrayOrganising colours and sizes3
Shop this project
Everything you need for this build. Quantities are a guide, so adjust to your design.

From £2.12 ex VAT

From £2.12 ex VAT
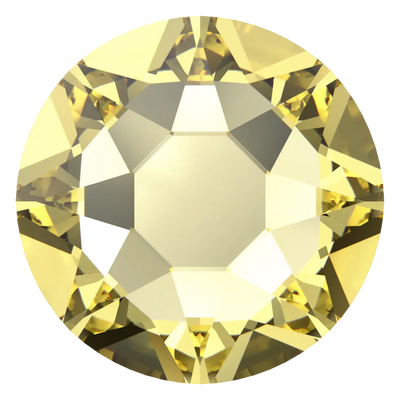

£1.95 ex VAT
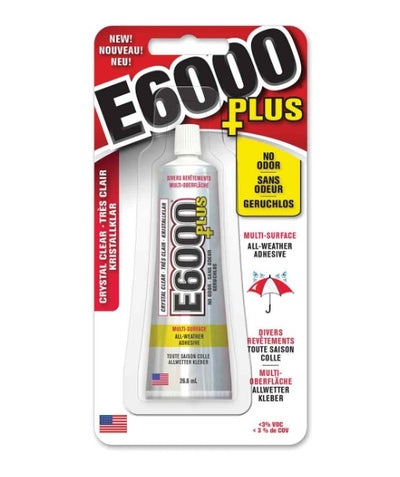
£7.80 ex VAT

£9.53 ex VAT

£5.12 ex VAT

£4.99 ex VAT
Not sure how many crystals you need? Use our Crystal Calculator to estimate by surface area.
How to bedazzle Toy Story figures
Step 1: Sort your crystals and prepare the glue
Place your crystals into the magic sorting trays, keeping each colour and size separate, then prepare your syringe with E6000 glue so everything is ready before you start.
Step 2: Crystal the crown of the hat
Starting with Jessie's hat, place a thin layer of glue on the crown. Using your SS5 Light Siam crystals, begin on the outer rim and work in circles inwards until the top section is filled.

Step 3: Crystal the top of the brim
Move on to the top side of the brim. Again, lay a thin layer of glue and work from the outside inwards. As you approach the walls of the crown you may find there is not enough space for SS5 crystals in places, so switch to SS3 to close those gaps neatly.
Step 4: Crystal the crown walls and the underside of the brim
Next, glue the walls of the crown and place your SS5 crystals in circles around it, working upwards to meet the section you completed first. To finish the hat, embellish the underside of the brim in the same way you did the top.
Step 5: Crystal the saddle fenders
Now move on to Bullseye's saddle, working predominantly in SS9 Smoked Topaz. Place a small amount of glue on the fender, filling the largest areas with SS9, then use SS7 and SS5 for the smaller spots. Repeat on the other fender.
Step 6: Crystal the saddle seat
Working in small sections, place a little glue on the seat. Starting at one side, lay a short row of SS9 crystals along the bottom rim in a U shape, then follow that same U-shaped curve as you work up the side. At the top, straighten your flatbacks into as neat a line as you can so the next section joins cleanly. Repeat on the other side and marry the two halves together at the top.

Step 7: Crystal the cuffs
Finally, Jessie's cuffs. These are very small areas, so work mostly in SS5 Jonquil. Glue the cuffs in small sections, working around and up in circles. Let the first layer of glue turn tacky for just over five minutes before placing anything, which stops the crystals slipping off the edge. Work around carefully and keep your placement neat, bearing in mind the cuff widens towards the top. Use SS7 and SS9 to fill the protruding sections, and remember to embellish the top and bottom edges.

Step 8: Leave to dry
Always leave your project for twelve hours to dry fully before handling it. Well done, you have made Jessie and Bullseye the stars of the show.
Frequently asked questions
How do you bedazzle a toy figure?
Work one small area at a time: brush a thin layer of glue onto the section, let it turn tacky, then place flatback crystals with a wax picker, working from the outer edge inwards. Drop to a smaller size wherever the shape narrows, then leave it to dry fully.
How many crystals do you need to cover a figure?
Covering a hat, a saddle and a pair of cuffs uses around 5,000 flatbacks across sizes, with the bulk in the smallest size. It depends on the size of your figures and how densely you pack them, so use our Crystal Calculator to estimate by area first.
What glue works best on plastic figures?
A flexible, industrial strength adhesive such as E6000. It bonds to the moulded plastic, fabric and leatherette these figures are made from, and stays slightly flexible so crystals stay put. Apply it thinly in small sections and let it turn tacky before placing.
How do you crystal small curved areas neatly?
Follow the shape rather than fighting it. On a hat, work in circles from the outside in. On a saddle seat, run a short row along the bottom rim in a U shape and follow that curve upwards. Straighten the top row before starting the next section so the seams line up.
Why do the crystals slip off the edge of small parts?
The glue is still too wet. On a tiny, curved piece like a cuff, leave the glue a little over five minutes so it turns properly tacky before you place anything. That grips each crystal instead of letting it slide off the edge.
Can I change the crystal colours?
Yes. These shades were picked to match the characters, but any palette works on a figure. We used our own Austrian made Serinity crystals here; you can also use premium Swarovski, Czech made Preciosa or budget Estella.
Make it your own
Match the palette to any character, crystal a single detail rather than the full set, or take the same method to other collectibles. For more character and display makes, see our rhinestone mask and Faberge-style egg projects, or explore the full Craft Studio.


