

To bedazzle a mask, you plan the design, sand any shiny areas so the glue can grip, then work in small sections, spreading a thin layer of glue and placing flatback crystals with a wax picker, letting each section set before the next. In this tutorial we give a white trooper-style cosplay mask a dramatic red smear design using Preciosa non-hotfix flatback crystals in Red Velvet AB across three sizes.
The same approach works on any rigid costume mask or helmet, and a single bold design element like this is far quicker than full coverage while still stealing the show. Here is everything you need, then the full method.
Project at a glance
- Difficulty: Beginner, one bold design element
- Time: An afternoon in sections, plus up to 24 hours drying
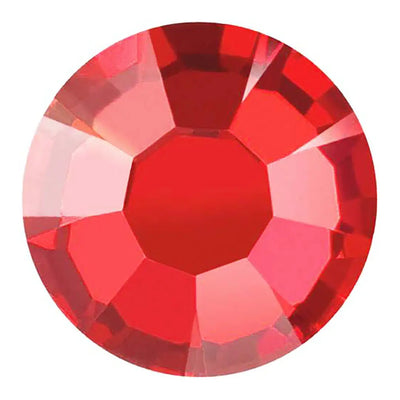
- Crystals used: Preciosa flatback rhinestones in Red Velvet AB, SS7, SS10 and SS16
- Technique: Sectioned flatback embellishment on a curved 3D surface
What you'll need
Quantities cover the smear design shown, so scale to yours. Add the crystals, glue and tools to your cart from the cards below. The picker, tray and syringe are reusable across every project, so browse the full range of tools and accessories to build your kit.
- Your mask, clean and dryWe used a white trooper-style cosplay mask1
- Preciosa Rhinestones Non Hotfix SS7, Red Velvet ABEdges and fine detail100
- Preciosa Rhinestones Non Hotfix SS10, Red Velvet ABMid rows100
- Preciosa Rhinestones Non Hotfix SS16, Red Velvet ABBroad sweep of the smear100
- Red acrylic paint (optional)Base layer to hide gaps in the smear1
- Supertite Fusion Tack Glue Kit (glue, syringe and tips)Bonding the crystals, dries clear1
- Wax Crystal Picker ToolPicking and placing1
- Magic Sorting TrayHolding the three sizes1
Shop this project
Everything you need for this build. Quantities are a guide, so adjust to your design.

£1.95 ex VAT

£5.12 ex VAT

£7.99 ex VAT
Not sure how many crystals you need? Use our Crystal Calculator to estimate by surface area.
How to bedazzle a mask
Step 1: Prepare your workspace
Set up on a clear, flat, well-lit surface where you will not be disturbed while you work, and where the mask can rest between sections.
Step 2: Prepare the mask
Make sure the mask is clean, and gently buff any shiny surface with sandpaper until it turns matt. The key gives the glue grip and ensures a strong bond between the surface and the crystals.
Step 3: Plan your design
Decide where the crystals will go and visualise the arrangement before any glue comes out. We chose a dramatic red smear sweeping across the white helmet, a single bold element that reads clearly from a distance and suits a costume far better than scattered dots.
Step 4: Load the glue syringe
Fill the syringe part way with Fusion Tack and spread a thin layer over a small section of the mask. Allow a few minutes for the glue to become tacky before placing crystals. You will know glue is fully dry when it turns clear and shiny.
Step 5: Place the crystals
Tip the three sizes into the Magic Sorting Tray and place each crystal with the Wax Crystal Picker Tool, outlining the smear first and working inwards, leaving as few gaps as possible. A trick for this design: paint the area with a layer of red acrylic first, so the red base conceals any small gaps between the rhinestones.
Step 6: Work in sections around the curve
Move around the mask in small sections, letting the glue set each time before continuing. On three-dimensional items gravity can slide crystals out of place before the glue has dried, so patience between sections is what keeps the design crisp. If any excess adhesive seeps out around a crystal, wipe it away carefully with a toothpick or a cotton swab dampened with a little nail polish remover.
Step 7: Let it dry
Once every crystal is in place, set the mask aside and let the adhesive dry completely, typically up to 24 hours. Then your custom creation is ready for its debut.
Frequently asked questions
How do you bedazzle a mask?
Clean the mask and buff any shiny areas with sandpaper, plan your design, then work in small sections: spread a thin layer of glue, let it turn tacky, and place flatback crystals with a wax picker, outlining each shape first and working inwards. Let each section set before moving on, then leave the mask up to 24 hours to fully dry.
How many crystals do I need for a mask design?
The red smear design shown took around 300 Preciosa crystals in Red Velvet AB, 100 each in SS7, SS10 and SS16. A design element like this uses far fewer stones than covering the whole mask, so sketch your design first and use the Crystal Calculator on our website to estimate quantities by stone size.
What glue works on a plastic mask?
A clear-drying glue such as Supertite Fusion Tack. If the plastic is shiny, gently sand the area first so the glue has a key to grip, apply in thin layers, and you will know the glue is dry when it turns clear and shiny. Allow up to 24 hours for a full cure before wearing.
How do you stop crystals sliding on a curved mask?
Work in small sections and let the glue set each time before continuing. On three-dimensional items gravity pulls crystals out of place while the glue is still wet, so resting the mask with the working section facing up, and waiting between sections, keeps every stone where you put it.
How do you remove excess glue from around crystals?
If adhesive seeps out around a stone, carefully wipe it away with a toothpick or a cotton swab dampened with a little nail polish remover before the glue cures. Work gently around the crystal edges so the stone itself stays seated and its coating is not touched by the remover.
Make it your own
The red smear is striking on white, but the same sectioned method suits any motif: trace a visor outline in jet, or scatter galaxy blues across the crown. For more costume and Halloween makes, see the masquerade mask embellishment and the crystal Halloween skull, or explore the full Craft Studio.


