
This sparkling seed bead star brooch is a joyful, beginner-friendly make and a lovely handmade gift. This step-by-step guide shows you how to bead-embroider a star using Preciosa seed beads stitched onto a felt base, then finish it with a brooch pin so you can wear your sparkle wherever you go.
Keep the design clean and simple, or add extra detail to make your star truly shine. Here is everything you need, then the full method.
Project at a glance
- Difficulty: Beginner (simple bead embroidery on felt)
- Time: A relaxed afternoon
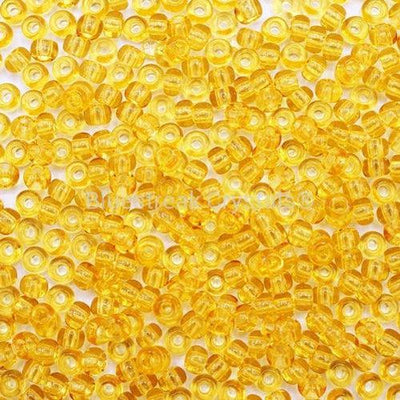
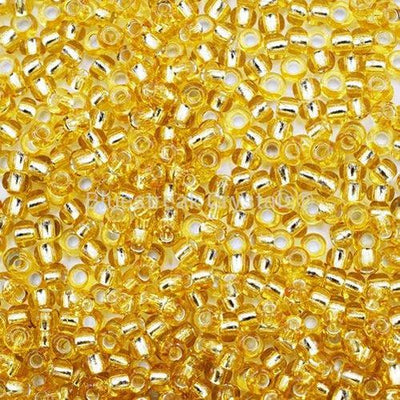
- Beads used: Preciosa Light Topaz seed beads, plain to fill and silver-lined (S/L) to outline
- Technique: Seed beads stitched onto a felt star, backed with a brooch pin
Watch the tutorial
See this project come together. Watch the full make below, then scroll down for the kit list and step-by-step instructions.
What you'll need
Quantities make one brooch. Add the beads, thread and findings to your cart from the cards below. The needle and trays are reusable across every project, so browse the full range of tools and accessories to build your kit.
- Felt, two star shapesYour base, front and backing2
- Preciosa Seed Beads Rocaille, Light TopazFilling the star20g
- Preciosa Seed Beads Rocaille, Light Topaz Silver-LinedOutlining the star20g
- Beading ThreadStitching the beads1
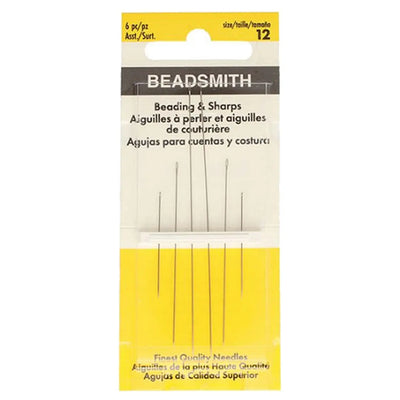
- Beading NeedlesSewing1
- Bar Brooch PinThe back finding1
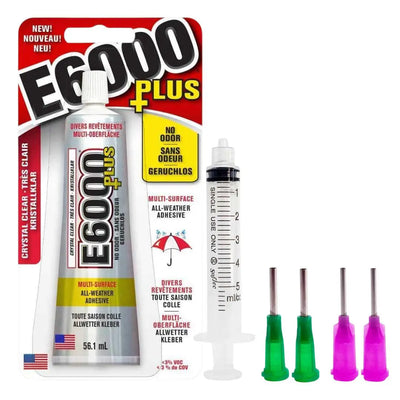
- E6000 Glue KitFixing the brooch pin1
- Magic Sorting TrayOrganising beads2
Shop this project
Everything you need for this build. Quantities are a guide, so adjust to your design.
Not sure how many crystals you need? Use our Crystal Calculator to estimate by surface area.
How to make a seed bead star brooch
Step 1: Gather your supplies
Tip your beads into the sorting trays so they are easy to reach. Cut out a star shape from felt, then pin it securely to a second star-shaped piece of felt underneath, which gives the brooch a firm double-layer base.
Step 2: Outline the star
Using the silver-lined Light Topaz seed beads, stitch a line of beads from each outer point of the star in towards the centre. Do the same from each inner point. This divides the star into neat sections to fill and gives the outline extra sparkle.
Step 3: Fill the sections
Now fill the star with the plain Light Topaz seed beads. Pick a section and stitch rows of beads vertically until it is filled, then fill the next section with horizontal rows, alternating direction section by section. The changing direction catches the light differently across the star.
Step 4: Finishing touches
Remove any pins from your work, then sew or glue a bar brooch pin to the back of the felt with E6000. Let it cure fully before wearing.
Frequently asked questions
How do you make a seed bead brooch?
With bead embroidery. You sew seed beads onto a felt base in your chosen shape, filling it row by row, then finish the back with a brooch pin. It needs only a needle, thread and beads, which makes it a relaxing, beginner-friendly project.
What is bead embroidery?
It is the craft of stitching beads onto a fabric or felt backing to build up a design, rather than threading them into a chain. Working on felt gives you a firm, forgiving base, so it is a great way to start beading without any special frame or loom.
What beads work best for a beaded brooch?
Small rocaille seed beads, which sit closely together for smooth coverage. We used Preciosa Light Topaz seed beads to fill the star, with silver-lined Light Topaz to outline it, but any rocaille colours work for your own design.
What is the difference between Light Topaz and Light Topaz S/L?
S/L means silver-lined: the bead has a mirrored lining inside its hole that bounces light back out, so it sparkles more than the plain finish. Using the silver-lined beads to outline the star makes the edges catch the light and pop against the fill.
How do you attach a brooch back?
Once the beading is finished and the pins are removed, sew or glue a bar brooch pin to the felt backing. A strong adhesive like E6000 holds it firmly; stitching it on as well makes it extra secure for everyday wear.
Can I change the design or colours?
Yes. The felt-and-bead method works for any simple shape, from a heart to a flower, and any palette you like. We used Czech-made Preciosa seed beads here, and you can also use our own Serinity, premium Swarovski or budget Estella beads.
Make it your own
Once you have the technique, try a heart, a flower or an initial, and play with colours and finishes. For more beaded brooches, see our seed bead pumpkin brooch and beaded heart brooch projects, or explore the full Craft Studio.


