

Got a passion for all things sparkly? This guide shows you how to make a dazzling crystal butterfly using Preciosa non-hotfix flatback crystals, bringing a butterfly to life in shimmering, ombre detail. It is a lovely way to add a touch of enchantment to your decor, accessories or outfits.
It is an easy, beginner-friendly project and simple to personalise with your own colours. Here is everything you need, then the full method.
Project at a glance
- Difficulty: Beginner
- Time: 1 to 2 hours, plus at least 12 hours to cure
- Crystals used: Preciosa flatbacks in Fuchsia, ombre sizes SS5, SS7, SS10, SS12 and SS16
- Best crystal type: Non-hotfix flatbacks, glue-set to the butterfly
Watch the tutorial
See this project come together. Watch the full make below, then scroll down for the kit list and step-by-step instructions.
What you'll need
Quantities suit a medium butterfly in a full ombre, so scale them to yours. Add the crystals, glue and tools to your cart from the cards below. The picker and trays are reusable across every project, so browse the full range of tools and accessories to build your kit.
- Butterfly shape or blankYour base, see note below1
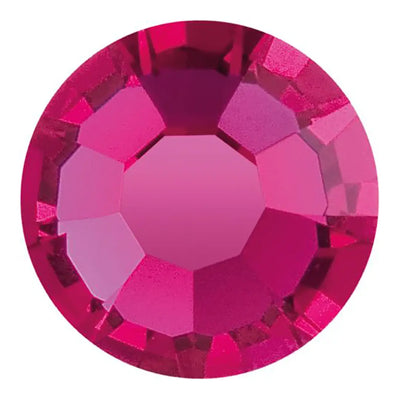
- Preciosa Non-Hotfix Flatbacks SS16, FuchsiaOmbre, largest100
- Preciosa Non-Hotfix Flatbacks SS12, FuchsiaOmbre100
- Preciosa Non-Hotfix Flatbacks SS10, FuchsiaOmbre100
- Preciosa Non-Hotfix Flatbacks SS7, FuchsiaOmbre100
- Preciosa Non-Hotfix Flatbacks SS5, FuchsiaOmbre, tips and detail200
- E6000 Plus Glue KitAdhesive with syringe1
- Wax Crystal Picker PenPlacing crystals1
- Magic Sorting TrayOrganising sizes5
Shop this project
Everything you need for this build. Quantities are a guide, so adjust to your design.

£1.95 ex VAT

£5.12 ex VAT

£9.53 ex VAT
Not sure how many crystals you need? Use our Crystal Calculator to estimate by surface area.
How to make a crystal butterfly
Step 1: Gather your supplies
Tip your flatbacks into the sorting trays, keeping each size separate so they are easy to reach. Make sure the tip of your wax picker is sharp, which makes lifting each crystal easier, then load your E6000 glue into the syringe.
Step 2: Map out your design
Before gluing, plan your placement, especially around the smaller and awkward areas of the wings. Decide how your ombre will flow, for example which size sits where, so you achieve a smooth, even gradient rather than a patchy one.
Step 3: Place the crystals
Apply the glue a little at a time, using just enough to hold each stone, as too much looks messy. Work your ombre across the wings, using the larger sizes for the broad areas and the smaller SS5 and SS7 for the tips and tight spaces, lifting each crystal into place with the wax picker.
Step 4: Inspect and adjust
Once everything is placed, check your work and nudge any crystals into line before the glue sets. It is far easier to adjust now than once it has dried.
Step 5: Leave to cure
Leave the butterfly to cure for at least 12 hours so the bond is fully set before you display or wear it.
Frequently asked questions
How do you make a crystal butterfly?
Take a plain butterfly shape, plan your design, then glue flatback crystals across it one at a time with a strong adhesive, lifting each with a wax picker. Working in an ombre of sizes from the wingtips inwards gives a graduated, eye-catching finish. Leave it to cure fully before handling.
What can I use as the butterfly base?
A plain butterfly blank works best: a wooden, acrylic or metal butterfly shape, or a butterfly hair clip or brooch if you want to wear it. You need a firm, smooth surface for the glue to grip, so a solid blank is easier to crystal than a fabric one.
What glue holds crystals on a butterfly?
A flexible, industrial-strength adhesive like E6000. It bonds to wood, acrylic and metal and stays put once cured. Apply it sparingly so it does not squeeze up around the edges, and use a wax picker to place each crystal neatly.
How do you create an ombre crystal effect?
Graduate the crystal sizes across the wings, for example larger SS16 stones at the centre or base flowing out to tiny SS5 at the tips, or fade from a deep shade to a lighter one. Blending the sizes and tones gradually is what gives the smooth ombre look.
Should I use hotfix or non-hotfix crystals?
Non-hotfix, glue-set flatbacks are the most versatile, since they bond to any base without heat. Hotfix crystals need heat to activate, which is not suitable for plastic, acrylic or pre-finished butterfly blanks, so glue-set non-hotfix crystals are the safe choice.
How many crystals and which colours do I need?
It depends on the butterfly's size. This ombre design used around 600 Fuchsia flatbacks across SS5, SS7, SS10, SS12 and SS16. Use our Crystal Calculator to estimate by area, and pick any palette. We used Czech-made Preciosa; you can also use premium Swarovski, our own Austrian-made Serinity, or budget Estella.
Make it your own
Try a different ombre, a two-tone wing, or a single statement colour. For more enchanting crystal makes, see our forever rose and daisy chain earrings projects, or explore the full Craft Studio.


