
Want to recreate the iconic red and gold superhero suit in dazzling crystal? This guide shows you how to bedazzle an Iron Man helmet with Swarovski non-hotfix flatback crystals, covering the red, gold and silver shell in hand placed rhinestones for a mirror bright, screen worthy finish.
It is an advanced build that takes time, but every section follows the same simple glue and place method, so patience matters more than skill. As an Authorised Swarovski Distribution Partner, Bluestreak Crystals supplies the complete genuine range, sourced directly from Austria with reliable colour matching, so your shades stay true from the first pack to the last. Here is everything you need, then the full method.
Project at a glance
- Difficulty: Advanced
- Time: 15 to 20 hours, plus curing time between sections
- Crystals used: Swarovski 2088 flatbacks in Light Siam, Crystal Aurum and Silver Night
- Best crystal type: Non-hotfix flatbacks, glue-set to the helmet
Watch the tutorial
See this project come together. Watch the full make below, then scroll down for the kit list and step-by-step instructions.
What you'll need
Quantities suit full coverage of a standard helmet, so scale them to your helmet and design. A retail pack holds 50 crystals and a wholesale pack 1,440, and the counts below are the approximate number of stones each section needs, around 11,900 in total. Add the crystals, glue and tools to your cart from the cards below. The picker and trays are reusable across every project, so browse the full range of tools and accessories to build your kit.
- Iron Man helmet (your own), clean and dryYour base1
- Swarovski 2088 Light Siam SS20Red shell, main coverage5,760 (4 wholesale packs)
- Swarovski 2088 Light Siam SS16Red shell, coverage200 (4 retail packs)
- Swarovski 2088 Light Siam SS12Red shell, gap fill100 (2 retail packs)
- Swarovski 2088 Light Siam SS9Red shell, gap fill100 (2 retail packs)
- Swarovski 2088 Light Siam SS7Red shell, fine gaps100 (2 retail packs)
- Swarovski 2088 Light Siam SS5Red shell, fine gaps100 (2 retail packs)
- Swarovski 2088 Crystal Aurum SS20Gold face, main coverage2,880 (2 wholesale packs)
- Swarovski 2088 Crystal Aurum SS16Gold face, coverage200 (4 retail packs)
- Swarovski 2088 Crystal Aurum SS12Gold face, gap fill150 (3 retail packs)
- Swarovski 2088 Crystal Aurum SS9Gold face, gap fill200 (4 retail packs)
- Swarovski 2088 Crystal Aurum SS7Gold face, fine gaps200 (4 retail packs)
- Swarovski 2088 Crystal Aurum SS5Gold face, fine gaps200 (4 retail packs)
- Swarovski 2088 Crystal Aurum SS3Gold face, finest gaps200 (4 retail packs)
- Swarovski 2088 Silver Night SS20Side panels, main300 (6 retail packs)
- Swarovski 2088 Silver Night SS16Side panels, coverage200 (4 retail packs)
- Swarovski 2088 Silver Night SS12Side panels, gap fill200 (4 retail packs)
- Swarovski 2088 Silver Night SS9Side panels, gap fill200 (4 retail packs)
- Swarovski 2088 Silver Night SS7Side panels, fine gaps200 (4 retail packs)
- Swarovski 2088 Silver Night SS5Side panels, fine gaps200 (4 retail packs)
- Swarovski 2088 Silver Night SS3Side panels, finest gaps200 (4 retail packs)
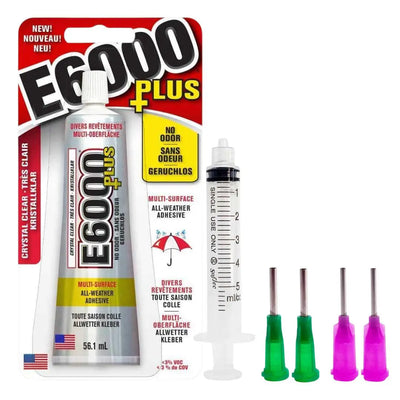
- E6000 Plus Glue KitAdhesive with syringe and tips1
- Wax Crystal Picker PenPlacing crystals1
- Magic Sorting TrayOrganising colours and sizes4
Shop this project
Everything you need for this build. Quantities are a guide, so adjust to your design.

From £2.23 Excl. VAT

From £2.60 Excl. VAT

From £2.60 Excl. VAT

£1.95 Excl. VAT

£7.80 Excl. VAT
£9.53 Excl. VAT

£5.12 Excl. VAT

£28.99 Excl. VAT
Not sure how many crystals you need? Use our Crystal Calculator to estimate by surface area.
How to bedazzle an Iron Man helmet
Step 1: Sort your crystals and fill the glue syringe
To begin, fill your syringe with E6000 glue and tip your first Light Siam SS20 wholesale pack into a magic sorting tray. A gentle shake settles the crystals face up, so they are quicker to pick up as you work.
Step 2: Start the red section
Start with the largest area of the helmet, the red portion. Place a small patch of glue at the top of the helmet where the red section begins. Keep the patch modest and the layer thin, as too much glue creates a messy result. Let the glue get tacky for five to ten minutes before placing any crystals, so they do not slip around during application.
Step 3: Place your crystals in even rows
Place your crystals in even rows, taking your time so the application is as neat as possible. Gradually make each line longer as the red section widens towards the crown.

Step 4: Work section by section
Once your first patch is filled, inspect your work and nudge any crystals that have shifted. Then lay down another patch of glue, wait for it to turn tacky, and carry on placing your crystals.
Step 5: Join the sides into the main section
Try to keep your crystals in even rows all the way around the helmet. Start the sides of the red section separately and join them into the main section as you progress. You can either work all the way down the back, or stop three quarters of the way down and start again along the bottom at the back. Joining these sections creates a circle you can then fill in. As the glue takes a while to set, you have time to adjust the joins so everything looks uniform.

Step 6: Fill the gaps in the red
Once the main red section is done, go back in with smaller crystals to fill any gaps left behind. As you are working in SS20, some gaps will be too small for that size, so drop down through SS16, SS12, SS9, SS7 and SS5 as needed.
Step 7: Move on to the gold section
Now move on to the gold faceplate. Tip your first Crystal Aurum SS20 wholesale pack into a clean magic sorting tray. Again, start from the top and work down. The curved areas are easiest done separately and joined as you move down the face. Complete as much as you can in SS20.
Step 8: Fill the gold gaps
After the main gold areas are covered, go in with smaller sizes to fill any gaps the SS20 could not reach, sizing down through SS16, SS12, SS9, SS7, SS5 and SS3 for the tightest spaces.

Step 9: Crystal the silver side panels
Finally, move on to the silver sections on either side of the helmet. These contain small areas, so start with Silver Night SS20 for the larger portions, then gradually size down as each section narrows. You will need to eyeball this as you go, which is why the build is rated advanced. Take your time and adjust while the glue is still wet.
Step 10: Inspect and cure
To finish, inspect the whole helmet for any mistakes. E6000 is easy to lift if you want to redo a section. Once you are happy, leave the glue to cure for twelve hours and your helmet is complete.
Frequently asked questions
How do you bedazzle an Iron Man helmet?
Clean and lightly buff the helmet, then glue flatback crystals on in small sections, letting each patch of glue turn tacky first. Work in neat rows, cover the red, gold and silver areas in turn with your largest size, then fill the gaps with smaller crystals and cure.
How many crystals do you need to cover a helmet?
A full helmet needs several thousand flatbacks across sizes, with the bulk in your largest size and smaller ones to fill gaps. It depends on your helmet and how densely you pack them, so use our Crystal Calculator to estimate by area before you buy.
What glue works best on a plastic helmet?
A flexible, industrial strength adhesive such as E6000. It bonds to the hard plastic shell and flexes with it rather than cracking off, and it stays workable long enough to adjust each crystal. Buff any glossy areas matt first so the glue grips well.
Should I use hotfix or non-hotfix crystals on a helmet?
Non-hotfix, glue-set flatbacks. Hotfix crystals need heat to activate their backing, which you must never apply to a plastic helmet, so glue-set non-hotfix crystals are the only safe choice for this kind of base.
How do you crystal the curved parts of a helmet neatly?
Work in even rows and start tight or curved areas as separate sections, joining them into the main coverage as you go. Drop down a size or two as a section narrows, eyeballing the fit, so the rows stay neat around the contours.
Can I change the colours or use a different helmet?
Yes. Swap the red, gold and silver for any character or colourway, and the same method works on any smooth helmet or mask. We used premium Swarovski here; you can also use our own Austrian made Serinity, Czech made Preciosa or budget Estella.
Make it your own
Swap the palette for any hero or colourway, scale the design from a few accents to full coverage, or take the same method to a mask. For more character makes, see our Batman cap and Guy Fawkes mask projects, or explore the full Craft Studio.


