
Outlining a logo in crystals is the quickest way to take a plain cap to superhero status, and it is an ideal first embellishment project. This guide shows you how to rhinestone a cap using Swarovski flatback crystals, traced around a bold logo so it catches the light from across the room.
Because you are following the existing logo outline, there is no design to plan, which makes this very forgiving. Pick a crystal size that fits the lines of your logo, glue in small sections and place each stone with a wax picker. Here is everything you need, then the full method.
Project at a glance
- Difficulty: Beginner, the logo is your guide
- Time: An hour or so, plus drying
- Crystals used: Swarovski non-hotfix flatbacks in Crystal, SS7
- Technique: Flatback outline embellishment with resin glue
What you'll need
Quantities suit the logo outline shown, so measure yours and scale to suit. Add the crystals and glue to your cart from the cards below. The picker, tray and syringe are reusable across every project, so browse the full range of tools and accessories to build your kit.
- Your own cap, clean and dryYour base; any logo or design to trace1
- Swarovski Non-Hotfix Flatbacks SS7, CrystalOutlining the logo400
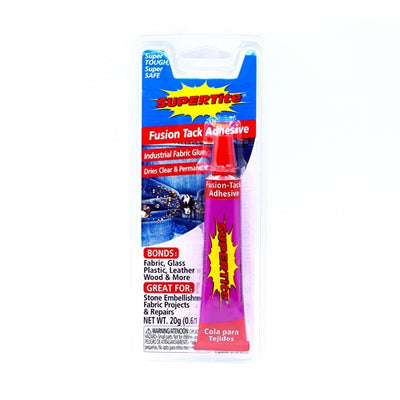
- SuperTite Fusion Tack Glue KitBonding the crystals, dries clear1
- Wax Crystal Picker ToolPicking and placing1
- Magic Sorting TrayHolding the crystals while you work1
Shop this project
Everything you need for this build. Quantities are a guide, so adjust to your design.

From £1.88 Excl. VAT

£1.95 Excl. VAT

£5.12 Excl. VAT
Not sure how many crystals you need? Use our Crystal Calculator to estimate by surface area.
How to rhinestone a cap
Step 1: Choose your crystal size
Measure the lines of your logo and pick a crystal size that sits neatly along them. On our Batman cap, SS7 let three crystals fit between the horns of the logo. To work out quantity, measure around the outline and divide by the width of your chosen stone; the measurements on every product page make this easy.
Step 2: Fill the glue syringe
Remove the plunger from the syringe and gently squeeze in the SuperTite Fusion Tack glue so it runs down one side without covering the far opening, letting air escape as you fill. Reinsert the plunger carefully; you will feel resistance because the seal needs to be airtight, and it pops into place when seated.
Step 3: Remove air bubbles
Hold the syringe vertically so the glue slides away from the opening, then gently push the plunger until only glue remains inside. Attach the needle tip and the syringe is ready.
Step 4: Apply the glue
Squeeze a thin line of glue along the outer edge of the logo. Keep it thin: too much squeezes up around the stones and dulls the sparkle. On a curved cap, work in small sections so you never touch wet glue while turning it.
Step 5: Place the crystals
Tip the crystals into the Magic Sorting Tray so they settle flat side down, then place each one along the glue line with the wax picker tool. Keep the crystals close together with as few gaps as possible for a crisp, continuous outline.
Step 6: Let the glue dry
Leave the cap to dry for at least an hour; drying time varies with how thickly the glue went on. You will know it is done when no white glue is visible, because Fusion Tack dries completely clear as well as waterproof.
Why Swarovski crystals for a cap
For a piece you will wear out and about, Swarovski's precision-cut facets and consistent colour earn their place, catching the light far more sharply than cheaper stones. As an Authorised Swarovski Distribution Partner, Bluestreak Crystals supplies the complete genuine range direct from Austria, now available to everyone with no minimum order.
Frequently asked questions
How do you rhinestone a cap?
Pick a crystal size that fits your logo, then pipe a thin line of clear-drying glue along the outline a small section at a time. Place each flatback crystal onto the glue with a wax picker tool, keeping them close together, and leave the cap to dry for at least an hour before wearing.
How many crystals do I need to outline a logo?
Measure around the logo outline and divide by the width of your chosen crystal. Our Batman logo used about 400 SS7 stones. To fill a logo solid rather than outline it, use the Crystal Calculator on our website to estimate quantities by area and stone size.
What glue works best on a fabric cap?
A flexible, clear-drying glue such as SuperTite Fusion Tack. It grips fabric and dries waterproof, and a fine syringe tip keeps the glue line neat along a logo. Make sure the cap is clean and dry first, and apply thin lines so glue does not squeeze up around the stones.
What size crystals are best for a logo?
It depends on the logo. Measure the narrowest line you need to follow and choose a size that fits two or three stones across it; smaller stones like SS7 hug tight curves, while larger stones cover open areas faster. Mixing two sizes helps the outline flow around detail.
Will the crystals stay on a cap?
Yes, once the glue has fully cured. Fusion Tack is waterproof when dry, so normal wear is no problem. Avoid machine washing; spot clean around the design by hand instead, and store the cap where the crystals will not be crushed against other items.
Can I use different colours or another design?
Yes. The same outline method works for any logo, initial or motif, and Swarovski flatbacks come in a huge colour range. Pick out a logo in its own colours, go all-clear for subtle sparkle, or fill the shape solid instead of outlining it for maximum impact.
Make it your own
Once you can outline a logo, you can crystallise almost anything you wear. Try initials on the back, a slogan along the peak, or a fully filled motif. For more wearable makes, see how to bedazzle a crystal top or a pair of festival boots, or explore the full Craft Studio.


