

Want a conversation piece that turns a kitchen staple into a showstopper? This guide shows you how to bedazzle a ketchup bottle with Swarovski non-hotfix flatback crystals, covering the whole bottle in deep red stones and picking out the label in crystal, right down to the lettering.
It is an advanced build that takes patience and a good eye for sizing, but every section uses the same simple glue and place method. As an Authorised Swarovski Distribution Partner, Bluestreak Crystals supplies the complete genuine range in sizes down to SS3, sourced directly from Austria, so you can match every colour and pick out the finest detail. Here is everything you need, then the full method.
Project at a glance
- Difficulty: Advanced
- Time: 5 hours, plus overnight to dry
- Crystals used: Swarovski flatbacks in Siam, Electric White Ignite, Jet, Golden Shadow and Fern Green, SS3 to SS16
- Best crystal type: Non-hotfix flatbacks, glue-set to the bottle
Watch the tutorial
See this project come together. Watch the full make below, then scroll down for the kit list and step-by-step instructions.
What you'll need
Quantities cover one standard bottle in the design shown, so scale them to your bottle and how much detail you pick out. A retail pack holds 50 crystals and a wholesale pack 1,440, and the counts below are the approximate number of stones each shade needs, around 3,200 in total. Add the crystals, glue and tools to your cart from the cards below. The picker and trays are reusable across every project, so browse the full range of tools and accessories to build your kit.
- Ketchup bottle (your own), clean and dryYour base, sticker peeled if you prefer1
- Swarovski Flatbacks SS5, SiamBody, fine gaps50 (1 retail pack)
- Swarovski Flatbacks SS7, SiamBody50 (1 retail pack)
- Swarovski Flatbacks SS9, SiamBody50 (1 retail pack)
- Swarovski Flatbacks SS12, SiamBody50 (1 retail pack)
- Swarovski Flatbacks SS16, SiamBody, main red coverage1,440 (1 wholesale pack)
- Swarovski Flatbacks SS5, Electric White IgniteLabel white, fine detail150 (3 retail packs)
- Swarovski Flatbacks SS7, Electric White IgniteLabel white100 (2 retail packs)
- Swarovski Flatbacks SS9, Electric White IgniteLabel white200 (4 retail packs)
- Swarovski Flatbacks SS12, Electric White IgniteLabel white100 (2 retail packs)
- Swarovski Flatbacks SS16, Electric White IgniteLabel white coverage250 (5 retail packs)
- Swarovski Flatbacks SS3, JetLabel lettering, finest100 (2 retail packs)
- Swarovski Flatbacks SS5, JetLabel lettering100 (2 retail packs)
- Swarovski Flatbacks SS7, JetLabel lettering50 (1 retail pack)
- Swarovski Flatbacks SS9, Golden ShadowLabel gold accents150 (3 retail packs)
- Swarovski Flatbacks SS3, Fern GreenLeaf, fine detail300 (6 retail packs)
- Swarovski Flatbacks SS5, Fern GreenLeaf50 (1 retail pack)
- E6000 Plus Glue KitAdhesive with syringe and tips1
- Wax Crystal Picker PenPlacing crystals1
- Magic Sorting TrayOrganising colours and sizes5
Shop this project
Everything you need for this build. Quantities are a guide, so adjust to your design.
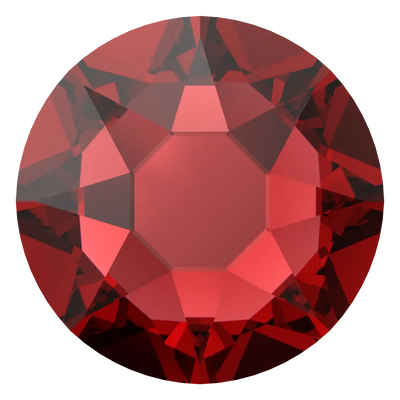

From £2.23 ex VAT

From £1.91 ex VAT

From £2.60 ex VAT

From £2.23 ex VAT

£1.95 ex VAT

£5.12 ex VAT

£9.53 ex VAT
Not sure how many crystals you need? Use our Crystal Calculator to estimate by surface area.
How to bedazzle a ketchup bottle
Step 1: Sort your crystals and prep the bottle
To begin, prepare your glue and pour your flatbacks into the magic sorting trays. Start with the main body, so tip out your Siam SS16 flatbacks. We peeled the rear sticker off the bottle before starting, which you can do too.
Step 2: Lay the first row at the base
Work from the bottom of the bottle upwards. Run a layer of glue around the base and let it get tacky, then place your first row of flatbacks. Let this row dry fully before going further, as it is what the rest of the rows sit against and stops them slipping.
Step 3: Work up the body in a honeycomb
Using the honeycomb method, apply your flatbacks in rows and work up the bottle. Leave the front label and the sticker around the top clear, and skip any raised or uneven sections for now, as you will come back to those.
Step 4: Start the label lettering
Once the body is done, move to the main label. Start with the text in your Jet flatbacks, which needs a mix of sizes you will eyeball as you go.
Step 5: Fill the white, leaf and tomato
Next, fill the white area around the text and the leaf and tomato image, again mixing sizes and using a trained eye. Adjust your flatbacks while the glue is still wet.
Step 6: Add the label border colours
For the last of the main label, place your Fern Green stones around the edge, then Golden Shadow, then Electric White.
Step 7: Fill the gaps around the label
With the main label done, use varying Siam sizes to fill the gaps left around the label and body.
Step 8: Crystal the top sticker
Move to the top sticker. Work from the middle outwards, starting with the oval emblem, then the white strip, then outwards from there. Working out from the centre avoids awkward gaps and keeps your sizing consistent. Then fill any red sections on the bottle that are still bare.
Step 9: Start the lid
Now the lid. Using Electric White Ignite, run a layer of glue around the bottom edge and let it get tacky before placing your flatbacks so they do not slip. Let this first row dry so it holds the row above, then work up the lid.
Step 10: Finish the top of the lid
For the top of the lid, work from the outside of the circle inwards for a neat finish.
Leave to dry overnight before using or touching your piece. Congratulations, you have added serious flair to your ketchup, a real dining room conversation starter.
Frequently asked questions
How do you bedazzle a bottle?
Work from the base up. Run a layer of glue around the bottom, let it turn tacky, and place a first row of flatbacks, letting it dry so it holds the rows above. Build upwards in a honeycomb pattern, leaving the labels until last, then fill them with smaller stones and cure.
How many crystals do you need to cover a bottle?
A fully covered bottle with a crystal label uses a few thousand flatbacks across sizes, and this design used around 3,200. It depends on the bottle and how much of the label you pick out, so use our Crystal Calculator to estimate by area before you buy.
What is the honeycomb method?
It is a way of setting flatbacks so each stone nestles into the gap between the two below, like a honeycomb, rather than in straight stacked columns. It packs the stones tightly with the fewest gaps, which gives the smoothest, most even coverage on a curved surface.
What glue works best on a glass or plastic bottle?
A strong, flexible adhesive such as E6000. It bonds to glass and plastic and flexes a little with handling. Clean the bottle first, work in thin layers, and let each go tacky before placing so the stones grip instead of sliding on the smooth, curved surface.
How do you recreate a label in crystals?
Work it as blocks of colour. Start with the lettering in the smallest stones, then fill the background, then the images and border colours in turn. Leaving the label until the body is done gives you a clean space, and mixing sizes lets you follow every shape.
Can I change the design or colours?
Yes. Any bottle, brand or plain colourway works with the same method. We used premium Swarovski here for its consistent sizing and shine, which helps with fine label detail; you can also use our own Austrian made Serinity, Czech made Preciosa or budget Estella.
Make it your own
Bedazzle a favourite sauce, a spirits bottle or a plain colourway. For more drinkware and bottle makes, see our bedazzled water bottle and Stanley cup projects, or explore the full Craft Studio.


