
A plain hip flask is one of the most satisfying things to crystallise, turning a practical everyday object into a glittering status symbol. This guide shows you how to rhinestone a hip flask using Swarovski flatback crystals in Paradise Shine, covering the metal so your flask earns its place at the heart of the party.
The trick with any smooth, curved object is preparation and patience: key the surface so the glue grips, then work in small sections so you are never fighting wet glue. Paradise Shine's shifting rainbow flash does the rest. Here is everything you need, then the full method.
Project at a glance
- Difficulty: Intermediate, full coverage over two sides takes patience
- Time: A few hours per side, plus overnight drying each time
- Crystals used: Swarovski non-hotfix flatbacks in Paradise Shine, SS16
- Technique: Full-coverage flatback embellishment with resin glue on metal
What you'll need
Around 1440 SS16 crystals covered both sides of the flask shown, so scale to the size of yours. Add the crystals and glue to your cart from the cards below. The syringe, picker and tray are reusable across every project, so browse the full range of tools and accessories to build your kit.
- Your own hip flask, clean and dryYour base; sand shiny metal for grip1
- Swarovski Non-Hotfix Flatbacks SS16, Paradise ShineCovering the metal1440
- Sandpaper, 120 grit or higherKeying the surface1
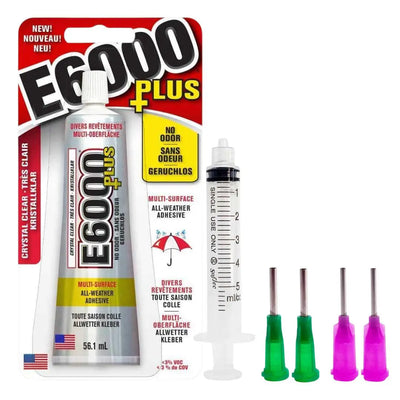
- E6000 Plus GlueBonding the crystals to metal, dries clear1
- Wax Crystal Picker ToolPicking and placing1
- Magic Sorting TrayHolding the crystals while you work1
Shop this project
Everything you need for this build. Quantities are a guide, so adjust to your design.

From £2.64 Excl. VAT

£1.95 Excl. VAT

£5.12 Excl. VAT
£9.53 Excl. VAT
Not sure how many crystals you need? Use our Crystal Calculator to estimate by surface area.
How to rhinestone a hip flask
Step 1: Prepare the flask
Make sure the flask is completely clean and dry. Metal is smooth, so gently sand the surface with 120 grit or higher until it has a rough key. This gives the glue texture to grip, which matters far more on shiny metal than it does on fabric.
Step 2: Fill the glue syringe
Place the open end of the syringe inside the nozzle of the E6000 Plus tube and pull the plunger while gently squeezing the tube. This transfers the glue with minimal mess and air exposure. Only load as much as you need for the session.
Step 3: Remove air bubbles
Hold the syringe upright so any air bubble floats to the top, then gently push the plunger until only glue remains inside. Attach the needle tip and the syringe is ready.
Step 4: Apply the glue in sections
Squeeze a thin layer of glue onto the sanded metal and leave it 5 to 10 minutes to turn tacky. Do not apply too much, or it will run on the curved surface. Work in small sections so you never touch wet glue while turning the flask.
Step 5: Place the crystals
Use the wax picker tool to place the Paradise Shine crystals onto the glue. A honeycomb layout works well: start along one straight edge and work across in interlocking rows. Keep the crystals close together with as few gaps as possible for a solid, continuous sparkle.
Step 6: Dry, then do the other side
Tidy up any stray glue at the edges and leave the flask to dry overnight. Once that side is fully cured, flip the flask over and repeat the process to cover the back.
Why Swarovski crystals for a hip flask
On a piece meant to be admired, Swarovski's precision-cut facets and effect coatings like Paradise Shine throw far more fire than ordinary stones. As an Authorised Swarovski Distribution Partner, Bluestreak Crystals supplies the complete genuine range direct from Austria, now available to everyone with no minimum order.
Frequently asked questions
How do you rhinestone a hip flask?
Clean the flask and sand the shiny metal to a rough key, then pipe a thin layer of resin glue, let it turn tacky, and place flatback crystals with a wax picker tool. Work in small sections in a honeycomb layout, leave it to dry overnight, then flip and repeat on the other side.
How many crystals do you need to cover a hip flask?
Both sides of the flask shown took around 1440 SS16 flatbacks, which is one wholesale pack. Flask size and shape change this, so use the Crystal Calculator on our website to estimate quantities by surface area and stone size before you buy.
What glue sticks crystals to metal?
A flexible, clear-drying resin glue such as E6000 Plus. Metal is smooth, so sand it first so the glue can grip, apply it in thin layers through a fine syringe tip so it cannot run, and let it cure overnight. The flexibility helps the bond survive handling and knocks.
Do you have to sand a hip flask before gluing?
For full coverage on shiny metal, yes. Sanding with 120 grit or higher creates a rough key that the glue can hold onto, which makes a big difference to how well the crystals stay put. Wipe away dust afterwards so the surface is clean and dry before you start gluing.
What is Paradise Shine?
Paradise Shine is a Swarovski effect coating that gives clear crystal a vivid, shifting rainbow flash, heavy on pinks, purples and greens. On genuine Swarovski flatbacks it makes a fully covered flask look iridescent and high-end, catching the light from every angle.
Can I use different colours or objects?
Yes. The same method covers bottles, vases, lighters and trinket boxes, and Swarovski flatbacks come in a huge range of colours and effects. Choose a single shade for a sleek finish, or blend colours in an ombre or pattern to suit the piece you are transforming.
Make it your own
Once you can cover a flask, any smooth object is fair game. Try a two-tone ombre, a monogram in a contrast colour, or pick out a band around the middle. For more coverage makes, see how to crystallise a champagne bottle or a Stanley cup, or explore the full Craft Studio.


