
To bedazzle a skull, you sand any shiny areas so the glue can grip, then work in small sections, spreading a thin layer of glue and placing flatback crystals with a wax picker, densest at your chosen feature and scattering outwards. In this tutorial we give a black skull a starburst design using a Swarovski non-hotfix flatback crystals size mix, whose blend of stone sizes makes the ombre fade look completely natural.
As an official Authorised Swarovski Distribution Partner, every crystal we supply comes direct from Swarovski in Austria, available to everyone with no minimum order. Here is everything you need, then the full method.
Project at a glance
- Difficulty: Beginner, scatter designs are very forgiving
- Time: An evening per side, plus overnight drying
- Crystals used: Swarovski non hotfix Dream Mix in Crystal, every size in one pack
- Technique: Starburst scatter radiating from a focal feature
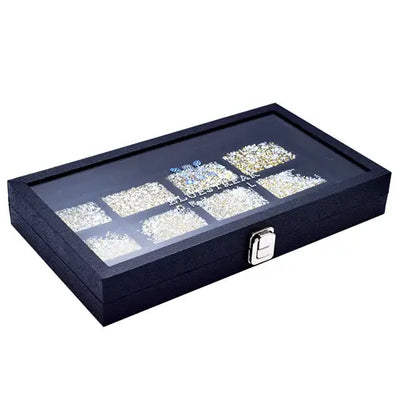
What you'll need
One mix covers the starburst shown with stones to spare. Add the crystals, glue and tools to your cart from the cards below. The picker, tray and syringe are reusable across every project, so browse the full range of tools and accessories to build your kit.
- Your skull, clean and drySand shiny surfaces lightly for grip1
- Swarovski Flatback Crystals Non Hotfix Dream Mix, CrystalThe starburst, all sizes in one mix1
- Supertite Fusion Tack Glue Kit (glue, syringe and tips)Tiny accurate dots of glue1
- Wax Crystal Picker ToolPicking and placing1
- Magic Sorting TrayHolding the size mix flat side down1
Shop this project
Everything you need for this build. Quantities are a guide, so adjust to your design.

£1.95 Excl. VAT

£5.12 Excl. VAT

£7.99 Excl. VAT
Not sure how many crystals you need? Use our Crystal Calculator to estimate by surface area.
How to bedazzle a skull
Step 1: Prepare your workspace
Set up on a clear, flat, well-lit surface where you will not be disturbed while you immerse yourself in the satisfyingly intricate work of rhinestone embellishment.
Step 2: Prepare the skull
Make sure the skull is completely clean and ready for gluing. If the surface is shiny, gently sand it until there is a rough key, which gives the glue a texture to grip securely.
Step 3: Set up the glue applicator
Fill the syringe part way with Fusion Tack by removing the back of the syringe and squeezing the glue into the cavity, then push the plunger back in. You are now ready to apply tiny, accurate dots of glue.
Step 4: Apply glue to one section
Squeeze out a thin layer of glue and leave it a few moments to get tacky. Keep the layer thin: too much glue runs in unwanted directions across the gently curving surfaces found on most skulls. Work in small sections so you never touch wet glue while handling a three-dimensional piece.
Step 5: Place the crystals in a starburst scatter
Tip the mix into the Magic Sorting Tray so the stones settle flat side down, then place each crystal with the Wax Picker Tool. We used a scatter style that blends outwards in an ombre for a spectacular starburst effect: begin along the cracked edge around the feature detail and spread out from there, keeping the crystals close together with as few gaps as possible in the most concentrated area. The wide range of sizes in the mix is what carries the fade, so use them all, and smaller crystal mixes are available if you need a lighter supply.
Step 6: Let the glue dry
Tidy up the edges and let the skull dry overnight. Once the glue is dry you can rotate the skull and repeat the process on the other side if you choose.
Frequently asked questions
How do you bedazzle a skull?
Clean the skull and gently sand any shiny areas so the glue has a key to grip, then work in small sections: spread a thin layer of glue, let it turn tacky for a few moments, and place flatback crystals with a wax picker tool. Start dense at your chosen feature and scatter outwards, then let it dry overnight.
What is the Swarovski Dream Mix?
A flatback crystal mix containing a wide range of stone sizes in large quantities, so one pack supplies a whole project like this with plenty left for the next. The mixed sizes are what make scatter designs look natural, and smaller crystal mixes are available if you need less.
What is a starburst rhinestone design?
A scatter style that radiates from a focal point: crystals sit densest at the feature, then blend outwards in an ombre until single stones trail off across the surface. The mixed sizes do the work, with larger stones anchoring the concentrated zone and the smallest carrying the fade.
Where do you start a scatter design?
At the focal point. On this skull we began along the cracked edge around the feature detail and spread out from there, keeping the crystals close together with as few gaps as possible in the most concentrated area, then loosening the spacing as the design radiates outwards.
How many crystals do I need to cover a skull?
One size mix covered the starburst design shown with stones to spare, because a scatter uses far fewer crystals than solid coverage. For a fully covered skull, estimate the surface area and use the Crystal Calculator on our website to work out quantities by stone size.
Make it your own
Crystal on black is striking, but jet stones on a white skull invert the drama, and a red starburst from one eye socket is pure theatre. For more gothic and Halloween makes, see how to bedazzle boots and make a make a beaded spider decoration, or explore the full Craft Studio.


