
To bedazzle boots, you plan the design with card templates, place anchor crystals at the key points, then connect the dots between them with flatback rhinestones, working one side of one boot at a time. In this tutorial we give a pair of gothic boots a symmetrical spider web and bat wing design using Swarovski non-hotfix flatback crystals in Electric Pink Ignite, an effect that glows spectacularly under UV light.
As an official Authorised Swarovski Distribution Partner, every crystal we supply comes direct from Swarovski in Austria, available to everyone with no minimum order. Here is everything you need, then the full method.
Project at a glance
- Difficulty: Intermediate, symmetry is a challenge
- Time: A side per session, with drying time between sides
- Crystals used: Swarovski non hotfix rhinestones in Electric Pink Ignite, SS12
- Technique: Template-guided anchor points, then connect the dots
What you'll need
Quantities cover the bat wing design across the pair. Add the crystals, glue and tools to your cart from the cards below. The picker, tray and syringe are reusable across every project, so browse the full range of tools and accessories to build your kit.
- Your boots, clean and dryFaux suede shown; match the glue to your material1 pair
- Swarovski Rhinestones Non Hotfix SS12, Electric Pink IgniteThe UV-reactive design1440
- Card for templatesCut the wing and heart guides1 sheet
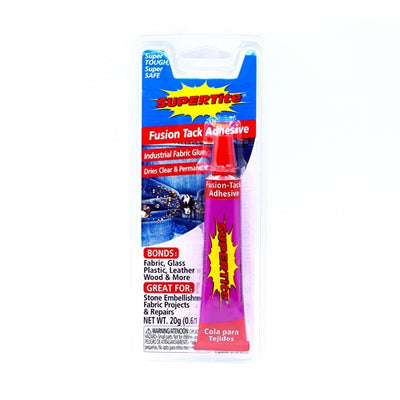
- Supertite Fusion Tack Glue Kit (glue, syringe and tips)Industrial-strength fabric glue1
- Wax Crystal Picker ToolPicking and placing1
- Magic Sorting TrayHolding the crystals flat side down1
Shop this project
Everything you need for this build. Quantities are a guide, so adjust to your design.

From £2.23 Excl. VAT

£1.95 Excl. VAT

£5.12 Excl. VAT
Not sure how many crystals you need? Use our Crystal Calculator to estimate by surface area.
How to bedazzle boots
Step 1: Prepare your workspace
Set up on a large, flat, well-lit surface where you can spread out your materials and leave the work in progress to dry overnight without disturbance.
Step 2: Plan out the design
Our crystals flow in a symmetrical spider web style, branching out into a bat wings silhouette with a heart shape at the centre. To guarantee symmetry, cut a template of the design out of card, plus a separate small heart template, and use them as guides for where the glue will go.

Step 3: Prepare the boot
Make sure the boot is completely clean and dry. The best glue varies with the boot material; the faux suede texture here lends itself to Supertite Fusion Tack, an industrial-strength fabric glue.
Step 4: Fill the glue syringe
Remove the plunger from the back of the syringe and slowly squeeze in the glue so it runs gently down one side without covering the far opening, letting air escape as you fill. Reinsert the plunger carefully; you will feel resistance because the seal needs to be airtight, and it pops into place when properly seated. Only take as much glue as you need.
Step 5: Remove air bubbles
Hold the syringe vertically so the glue slides away from the opening, then gently push the plunger until only glue remains inside. Attach the needle tip and the syringe is ready.
Step 6: Apply the rhinestones
Using the card templates as your guide, place the crystals that sit at the end of each wing tip and around the heart shape first. Once these anchor crystals are in place, the rest of the design is as simple as connect the dots. Pick up and place each stone with the wax picker tool, using only a small dot of glue per crystal.

Step 7: Do one side at a time
Allow each side of the boot to fully dry before flipping it over to embellish the other side. This prevents accidentally dislodging rhinestones that are not yet fully set.
Step 8: Repeat for the other boot
Repeat the process for the second boot, checking your work against the first regularly to keep the pair symmetrical, then allow the crystals to fully dry overnight.
Frequently asked questions
How do you bedazzle boots?
Plan the design first and cut card templates for any shapes, then work one side of one boot at a time: place a small dot of glue for each crystal, position the anchor stones at the key points of the design, and connect the dots between them with a wax picker. Let each side dry fully before turning the boot.
What glue works on suede boots?
An industrial-strength fabric glue such as Supertite Fusion Tack suits faux suede and other fabric finishes, gripping the textured surface without soaking through. The right glue does vary with the boot material, so match it to the surface: smooth leather and synthetics also take flexible resin glues well.
What are Ignite crystals?
Ignite is a Swarovski effect with an electric intensity of colour that glows spectacularly under UV light, so the design comes alive under blacklight at parties and club nights. We used Electric Pink Ignite, and the effect is at its boldest after dark.
How do you keep a rhinestone design symmetrical?
Cut card templates for the key shapes and use them as guides for the glue, then place the anchor crystals first, at the wing tips and around the heart, before filling the lines between them like connect the dots. Check the pair against each other regularly as you work rather than only at the end.
How many rhinestones do I need for a pair of boots?
The bat wing design shown took 1,440 Swarovski crystals in SS12 across the pair. A line-based design like this uses far fewer stones than full coverage, but quantities depend on your design and boot size, so sketch it first and use the Crystal Calculator on our website to estimate by stone size.
Make it your own
Electric Pink Ignite glows hot under blacklight, but the web and wings work in jet for stealth or Crystal AB for ice, and the template method suits any motif. For more footwear and Halloween makes, see how to bedazzle cow print boots and the crystal Halloween skull, or explore the full Craft Studio.


