


Stacked Beaded Bracelet Jewellery Project Made With Preciosa Beads
Welcome sparkling crafters and jewellery makers! Today, we are going to dive into the world of jewellery making and create a stunning handmade beaded bracelet using Preciosa beads. Get ready to add some sparkle to your spring wardrobe with this beautiful and unique accessory.
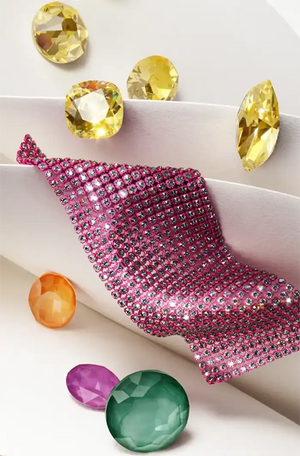
Preciosa beads are known for their high quality and dazzling shine. These Czech glass beads come in a variety of sizes, shapes, and colours, making them perfect for all your beading projects. For this bracelet, we will be using pink round beads alongside gold rondelle tube beads to create a feminine and elegant look.
Component List:
The full list of Preciosa beads, components and tools needed to complete this project can be found below. If you click on the product description (link), the respective product page will open, where each item can be viewed and added to cart:
|
Component
|
Component Name / Link
|
Quantity
|
 |
x 25 | |
 |
x 30 | |
 |
x 35 | |
 |
x 100 | |
 |
Monofilament Clear Illusion Cord | x 1 |
 |
Thread Cutters | x 1 |
 |
Bead Mat | x 1 |
 |
Gold Plated Bolt Ring Clasp 6mm | x 1 |
 |
Gold Plated Jump Ring 4mm | x 2 |
 |
Gold Plated Crimp Beads 2mm | x 2 |
 |
Gold Plated Crimp Cover | x 2 |
 |
Crimping Pliers | x 1 |
 |
Round Nose Pliers |
|
Instructions
Step 1
Cut three strands of illusion cord
Measure out enough illusion cord to wrap comfortably around your wrist plus some excess and cut that length three times.
Step 2
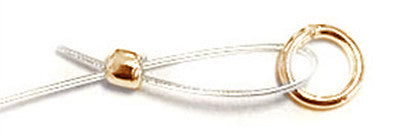
Loop the cords together using a crimp bead and a jump ring
Pass the three strands of illusion cord through the hole of a crimp bead, then through the hole of a jump ring. Now loop the illusion cord back through the crimp bead. It should resemble the image below:
STEP 3
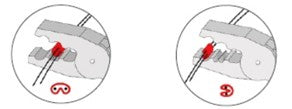
Secure the loop by crimping
Take the crimping pliers and press the inner set of teeth around the crimp bead, this will create a crescent moon shape, then press the half-crimped bead with the other set of teeth to press the two ends of the crescent tightly together. This will securely the pinch the bead tight round the strands of illusion cord, preventing it from sliding loose.
STEP 4
Conceal the crimp bead with a crimp cover
Use the Chain Nose Pliers the press the open sided Crimp Cover closed around the crimped bead. This will conceal the folded metal and give it the appearance of a simple gold bead.
STEP 5
Begin adding beads to the three strands of illusion cord
Assign a colour to each strand and begin adding beads to the three strands. Be aware that because there are three different sizes of bead in this design, you will need a different number of beads on each strand to cover the same amount of length.
You will need:
- 5 x 6mm Round Bead in Rose
- 6 x 5mm Round Bead in Pink Sapphire
- 7 x 4mm Round Bead in Light Rose
Step 6
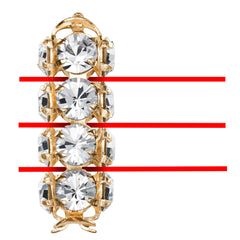
Add your first rondelle bead tube
The 20mm Rondelle Bead Tube has three conveniently located holes in the metal setting which will allow you to pass the three strands evenly through the bead.
Step 7
Repeat step 5 and 6
You can now begin alternating between the round beads and the rondelle bead tubes to create a repeating pattern. For this project we did four rondelles worth of repetition to create a bracelet, however you could easily adapt this pattern into a choker style necklace by repeating more times with more beads.
Step 8
Attach the clasp
Repeat the process described in steps one to four to secure the other end of the bracelet, this time using a clasp instead of a jump ring. At this point you might have some excess cord sticking out, you can conceal this by threading them back through a few beads and then trimming them using the Thread Cutters.
Congratulations you have completed the project!
So, there you have it, crafters and jewellery makers! With just a few simple steps and some beautiful Preciosa beads, you can create a stunning handmade beaded bracelet that is perfect for adding a touch of sparkle to your spring wardrobe. Get creative with your designs and have fun experimenting with different bead combinations. Happy beading!