

To bedazzle trainers, you colour the design area with permanent ink, spread a thin layer of flexible glue inside the shape, then outline with your largest crystals and scatter-fill the centre with smaller stones. In this tutorial we fill the side logo of a white pair using Preciosa non-hotfix flatback crystals in Light Rose AB across three sizes, around 500 genuine Czech-made stones for the pair.
The ink base layer is the trick that makes this design work, hiding every tiny gap between stones, and for a deeper dive into shoe materials and styles, see our complete guide to bedazzling sneakers with rhinestones. Here is everything you need, then the full method.
Project at a glance
- Difficulty: Beginner, one shape per shoe
- Time: An evening, plus overnight drying
- Crystals used: Preciosa flatback rhinestones in Light Rose AB, SS5, SS7 and SS10
- Technique: Ink base layer, largest-stone outline, scatter fill
What you'll need
Quantities cover the logo design across the pair, so scale to your design. Add the crystals, glue and tools to your cart from the cards below. The picker, tray and syringe are reusable across every project, so browse the full range of tools and accessories to build your kit.
- Your trainers, clean and dryWe used a white pair with a side logo design1 pair
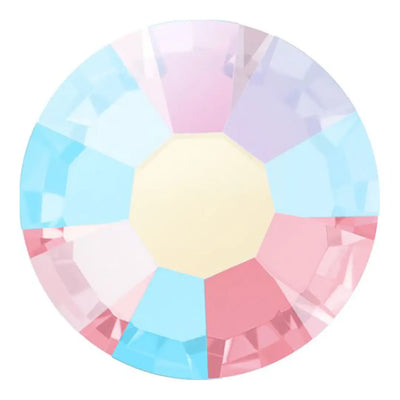
- Preciosa Rhinestones Non Hotfix SS5, Light Rose ABTight corners of the logo200
- Preciosa Rhinestones Non Hotfix SS7, Light Rose ABMid fill100
- Preciosa Rhinestones Non Hotfix SS10, Light Rose ABOutline and broad fill200
- Permanent ink marker in a matching shadeThe gap-hiding base layer1
- E6000 Plus Glue Kit (glue, syringe and tips)Flexible bond for footwear1
- Wax Crystal Picker ToolPicking and placing1
- Magic Sorting TrayHolding the three sizes1
Shop this project
Everything you need for this build. Quantities are a guide, so adjust to your design.

£1.95 ex VAT

£5.12 ex VAT

£9.53 ex VAT
Not sure how many crystals you need? Use our Crystal Calculator to estimate by surface area.
How to bedazzle trainers
Step 1: Clean and prepare the shoes
Set up in a well-lit, clean, comfortable space with room to spread out, and make sure the area you plan to embellish is completely clean and ready for gluing. We took a pair of white trainers and coloured the side logo with permanent ink so a complementary colour sits under the crystals. The inked base hides any gaps between the rhinestones and strengthens the edges, keeping the design bold and graphic as well as sparkly.
Step 2: Fill the glue syringe
Place the end of the syringe from the glue kit inside the nozzle of the E6000 Plus tube, then pull the plunger while gently squeezing the tube. The glue transfers with minimal mess and minimal exposure to the air. Only take as much as you need.
Step 3: Remove air bubbles
Hold the syringe vertically so any bubble floats to the opening at the top, then gently push the plunger until only glue remains inside. Attach the needle tip and the syringe is complete.
Step 4: Apply the glue
Squeeze a thin layer of glue into the logo shape and leave it for 5 to 10 minutes to get tacky. Resist applying too much: excess glue runs in unwanted directions and squeezes up between the crystals, preventing a tightly packed finish.
Step 5: Place your rhinestones
Start with the outline of the shape using the largest crystals, then fill the centre scatter-style: the scatter follows no set rules, so place whichever crystal fits the available space, keeping the stones close together with as few gaps as possible.
Step 6: Tidy up and dry
Tidy the edges with isopropyl alcohol if needed and let the shoe dry overnight. While the glue cures on the first shoe, you can begin the second.
Frequently asked questions
How do you bedazzle trainers?
Clean the area, colour the design shape with permanent ink so a matching base sits under the stones, then fill a syringe with E6000 Plus, spread a thin layer inside the shape and let it turn tacky for 5 to 10 minutes. Outline with the largest crystals, scatter-fill the centre, tidy the edges and dry overnight.
How do you stop gaps showing in a rhinestone design?
Colour the surface underneath with permanent ink in a shade that matches your crystals before any glue goes on. The inked base hides the tiny gaps that always exist between round stones and visually strengthens the edges, so the finished design reads bold and graphic as well as sparkly.
How do you fill a shape with mixed crystal sizes?
Outline the shape first using the largest crystals, which fixes a crisp edge, then fill the centre scatter-style with whichever size fits each remaining space. The scatter follows no set rules, so work stone by stone, keeping the crystals close together with as few gaps as possible.
Will rhinestones stay on trainers?
Yes, with the right glue and prep. E6000 Plus is a flexible resin that moves with the shoe rather than cracking off, provided the surface is completely clean before gluing and the glue cures fully overnight. Tidy any excess around the edges with isopropyl alcohol before it sets.
How many crystals do I need for trainers?
The logo fill shown took around 500 Preciosa crystals in Light Rose AB across the pair, 200 in SS5, 100 in SS7 and 200 in SS10. A logo design uses far fewer stones than covering the whole shoe, so measure your design area and use the Crystal Calculator on our website to estimate by stone size.
Make it your own
Light Rose AB on white is street-sweet, but jet on black goes stealth, and the ink-base trick works under any colourway or logo shape. For more footwear makes, see how to bedazzle high heels, or explore the full Craft Studio.


