
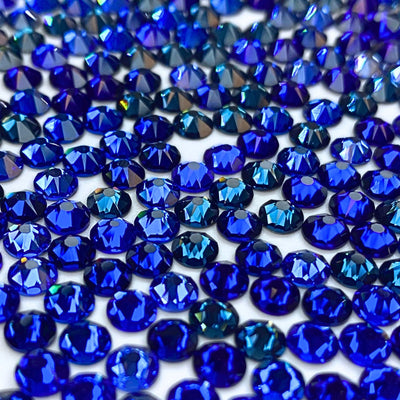
Bedazzling your Xbox controller is an easy way to make your setup one of a kind and your stream instantly recognisable. This step-by-step guide shows you how to cover a controller in flatback rhinestones, with the right glue, the right tools and a few controller-specific tips so the buttons still work perfectly. For this build we used the Serinity Caribbean Mix, but you can pick any colours you like to match your personal brand.
If you stream on Twitch or post your gameplay, crystals catch the light and add visual interest to your footage, and they make an easy talking point for your chat. Below is everything you need, with quantities, then the full method.
Project at a glance
- Difficulty: Beginner to intermediate
- Time: 2 to 4 hours, plus 24 hours to fully cure
- Crystals used: A flatback rhinestone mix (Serinity dark blue collection, or any colours you like)
- Best crystal type: Non-hotfix flatbacks (glue-set; never heat-apply hotfix to a plastic controller)
What you'll need
Quantities are a guide, so scale them to your design. Add everything to your cart from the cards below. The picker and tray are reusable across every project, so browse the full range of tools and accessories to build your kit.
- Xbox controllerYour base, clean and dry1
- Serinity Flat Back CrystalsThe sparkle, mix and match colours to your setup4
- E6000 Plus GlueAdhesive1
- Wax Crystal Picker ToolPlacing crystals1
- Magic Sorting TrayOrganising crystals1
Shop this project
Everything you need for this build. Quantities are a guide, so adjust to your design.

£7.80 Excl. VAT

£1.95 Excl. VAT

£5.12 Excl. VAT
Not sure how many crystals you need? Use our Crystal Calculator to estimate by surface area.
How to bedazzle an Xbox controller
Step 1: Plan your design and prep the surface
Decide which areas you want to cover first. Make sure the controller is clean and dry, then gently buff the surface you plan to crystal with fine sandpaper until it is no longer shiny. This gives the glue a "key" and a much stronger bond. Avoid the buttons, triggers, thumbsticks, the grips you hold, and any sensors or the charging port, so the controller stays fully usable.
Step 2: Sort your crystals
Tip your rhinestones into the Magic Sorting Tray, keeping different colours or sizes in separate sections so the right crystal is always easy to find. A gentle shake flips them face-up, which saves a lot of time on a fiddly, curved surface like a controller.
Step 3: Apply the glue
Using E6000 Plus glue, cover a small section with a thin, even layer and give it about 10 minutes to become tacky. You then have roughly an hour of working time on that section before it sets, and 24 hours to fully cure. Apply sparingly, as excess glue squeezing up around a crystal will dull its sparkle.
Step 4: Place the crystals
Use the Wax Crystal Picker Tool to lift and place each rhinestone in a tight scatter. When filling a shape, outline it first and work inwards, leaving as little space as possible between crystals for a seamless finish.
Step 5: Work in small sections
Move around the controller a small section at a time, letting each one set before you continue. A controller is three-dimensional, so gravity can slide crystals out of place before the glue dries, and setting as you go also stops you knocking crystals that are not yet secure.
Step 6: Clean and show it off
Once everything is fully cured, wipe the crystals with a soft cloth or tissue to remove any waxy residue from the picker tool. Your controller is ready for its close-up.
Frequently asked questions
Can I still use the controller after bedazzling it?
Yes, as long as you keep crystals off the buttons, triggers, thumbsticks, sensors, charging port and the areas you grip. Crystal the flat shell panels only and the controller works exactly as before.
What glue works best on a controller?
A flexible, industrial-strength adhesive such as E6000 Plus. It bonds to the plastic shell and flexes with it instead of cracking off. Buff the surface matt first so the glue has something to grip.
How many crystals do I need for a controller?
It depends how much you cover. A scatter or accent design needs far fewer than full coverage of the shell. Use our Crystal Calculator to estimate by area before you buy.
Should I use hotfix or non-hotfix crystals?
Non-hotfix (glue-set). Hotfix crystals need heat to activate their backing, which you must never apply to a plastic controller, so glue-set flatbacks are the only safe choice here.
Can I bedazzle a PlayStation or Nintendo Switch controller too?
Yes, the method is identical for a PS5 DualSense, Switch Pro Controller or Joy-Cons. Just keep clear of the same functional parts and any motion sensors.
Which crystals should I use?
Any flatback rhinestone works. We used our own Austrian-made Serinity Caribbean Mix here, but you can step up to premium Swarovski or down to budget Estella, and pick colours that match your stream branding.
Make it your own
A bedazzled controller is a quick, eye-catching way to stand out on stream, and choosing your own colours makes your setup instantly recognisable. For more tech and accessory makes, see our crystal phone case and custom water bottle projects, or explore the full Craft Studio.


