

The right shoes can transform an outfit, and a pair of gold heels covered in Swarovski flatback crystals in Crystal Golden Shadow makes you sparkle with every step. This guide shows you how to bedazzle gold heels for a wedding, party or any occasion where you want to steal the show, using a warm, tonal gold-on-gold finish.
As an official Authorised Swarovski Distribution Partner, every crystal we supply comes direct from Swarovski in Austria, available to everyone with no minimum order. The method works on any heel or shoe, so treat the colour and coverage here as a starting point. Here is everything you need, then the full steps.
Project at a glance
- Difficulty: Intermediate, full coverage rewards patience and a steady hand
- Time: A few hours per pair, plus overnight to cure
- Crystals used: Swarovski non-hotfix flatbacks in Crystal Golden Shadow, SS16 and SS12
- Technique: Outline and fill flatback embellishment, two sizes for a seamless finish
What you'll need
Quantities suit full coverage of a pair of heels, so scale them to your shoes and design. Add the crystals and glue to your cart from the cards below. The picker and tray are reusable across every project, so browse the full range of tools and accessories to build your kit.
- Your own gold heels, clean and dryYour base; match the glue to the material1 pair
- Swarovski Non-Hotfix Flatbacks SS16, Crystal Golden ShadowThe broad coverage1440
- Swarovski Non-Hotfix Flatbacks SS12, Crystal Golden ShadowCurves, edges and gaps1440
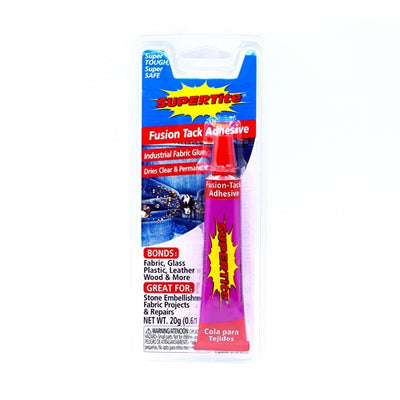
- Supertite Fusion Tack GlueFlexible fabric adhesive, dries clear1
- Wax Crystal Picker ToolPicking and placing1
- Magic Sorting TrayHolding both sizes flat side down1
Shop this project
Everything you need for this build. Quantities are a guide, so adjust to your design.

From £2.60 ex VAT

£1.95 ex VAT

£5.12 ex VAT
Not sure how many crystals you need? Use our Crystal Calculator to estimate by surface area.
How to bedazzle gold heels
Step 1: Prepare the shoes
Make sure each shoe is completely clean and dry. The best glue depends on the material: faux suede and fabric suit Supertite Fusion Tack, while smooth, patent or leather shoes do better with a resin glue such as E6000 Plus. On a glossy surface, lightly buff it first so the glue has a key to grip.
Step 2: Plan the coverage
Decide how much of the shoe you are covering, whether it is the heel, the toe, a panel or the whole upper. For full coverage, work out a starting point, usually a top edge or seam, so you can lay neat rows that follow the curve of the shoe rather than fighting it.
Step 3: Apply the glue
Spread a thin, even layer of glue over a small section and leave it a few minutes to turn tacky. Keep the layer thin, as too much glue runs on the curved surface and squeezes up between the stones, dulling their sparkle. Work in small sections so the glue never dries before the crystals go on.
Step 4: Place the crystals
Tip both sizes into the Magic Sorting Tray and place each stone with the Wax Crystal Picker Tool. Outline each area first, then fill inwards, using SS16 across the broad areas and switching to SS12 around the heel, edges and tighter curves. Keep the crystals close together with as few gaps as possible.
Step 5: Work in sections and check symmetry
Move around the shoe a small section at a time, letting each set before you continue so gravity cannot slide stones out of place on the curved surface. Check both shoes against each other as you go to keep the pair even.
Step 6: Cure overnight
Tidy any stray glue at the edges, then leave the shoes to cure fully overnight before wearing so nothing is knocked out of position. The bond is at its strongest once the glue has completely set.
Frequently asked questions
How do you bedazzle gold heels?
Clean and dry the shoes, then work one small section at a time: spread a thin layer of flexible glue, let it turn tacky, and place flatback crystals with a wax picker, outlining each area first and filling inwards. Use a larger size for broad areas and a smaller one for curves, then cure overnight before wearing.
What glue works best for crystals on shoes?
It depends on the material. Fabric and faux suede grip best with a flexible fabric glue such as Supertite Fusion Tack, while smooth, patent or leather shoes do better with a resin glue like E6000 Plus. Whatever you use, the shoe must be completely clean and dry first, with glossy surfaces lightly buffed.
How many crystals do you need to cover a pair of heels?
Full coverage of the heels shown used around 1440 SS16 and 1440 SS12 flatbacks, roughly 2880 across the pair. A heel-only or panel design needs far fewer. Coverage depends on your shoe size and design, so use the Crystal Calculator on our website to estimate quantities by stone size.
Why use two crystal sizes on one shoe?
A shoe is full of curves, seams and a narrowing heel that a single size cannot follow cleanly. The larger SS16 stones cover the broad areas quickly, while the smaller SS12 traces the tighter contours and fills the gaps, which keeps the coverage seamless and the edges crisp.
What is Crystal Golden Shadow?
Crystal Golden Shadow is a warm, smoky gold Swarovski effect with a soft champagne tone that shifts in the light. On gold shoes it reads as a rich tonal gold-on-gold finish, elegant rather than brash, which makes it a favourite for weddings and black-tie occasions.
Will the crystals stay on when I wear the shoes?
The heel and toe take knocks, so use a strong, flexible glue suited to the material, press each stone firmly, and let the shoes cure overnight before wearing. Keep a few spare crystals to touch up the occasional one that works loose over time, as with any worn embellishment.
Make it your own
Golden Shadow on gold is subtly glamorous, but the same method works in any colour and on any shoe. Try a single statement heel, a graduated gradient, or a contrast colour to match an outfit. For more footwear makes, see how to bedazzle high heels and prom heels, or explore the full Craft Studio.


