
Rhinestone champagne flutes are one of the easiest ways to give a couple a personalised wedding gift that genuinely sparkles: a pair of glasses hand embellished with premium Swarovski non hotfix crystals, ready for the first toast. This step by step tutorial covers the glue that actually holds on glass, how to place a crystal size mix for full coverage and how to keep the finished flutes looking flawless. The whole project takes an afternoon plus an overnight cure, and no previous rhinestone experience is needed.
Project at a glance
- Difficulty: Intermediate, curved glass stem requires patience
- Time: An afternoon of placing, plus an overnight cure
- Crystals used: Swarovski non hotfix size mix in Crystal
- Technique: Scatter flatback embellishment with resin glue
Watch the tutorial
See this project come together. Watch the full make below, then scroll down for the kit list and step-by-step instructions.
What you'll need
- Champagne flutesYour base, clean and dryx 2
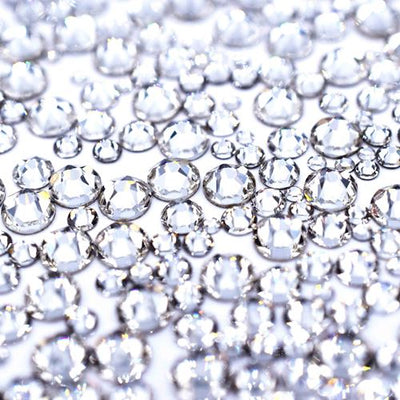
- Swarovski Flatback Crystals Non Hotfix Size Mix, CrystalThe sparkle, mixed sizes for full coveragex 4
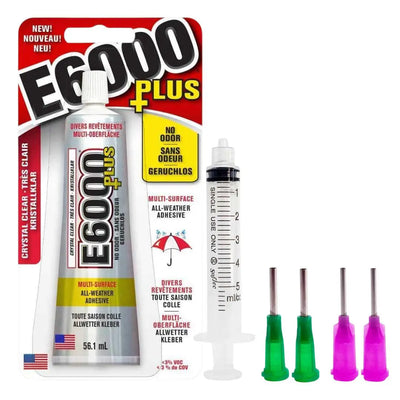
- E6000 Plus Glue KitGlue, syringe and tips for clean applicationx 1
- Wax Rhinestone Picker PenPicks up and places each crystalx 1
- Magic Sorting TrayFlips crystals the right way upx 1
Shop this project
Everything you need for this build. Quantities are a guide, so adjust to your design.

£1.95 Excl. VAT

£5.12 Excl. VAT
£9.53 Excl. VAT
Not sure how many crystals you need? Use our Crystal Calculator to estimate by surface area.
How to make Swarovski crystal wedding glasses
Step 1: Set up your workspace
Work on a large, flat, well lit surface where the flutes can be left to dry undisturbed overnight. Tip a pack of the size mix into the Magic Sorting Tray and give it a gentle shake so the crystals settle foil side down, ready to pick. Keep the crystals within easy reach, along with your picker pen and glue.
Step 2: Clean the glasses
Wash the champagne flutes and wipe them down with isopropyl alcohol so the surface is completely free of grease, fingerprints and loose fibres. Anything left on the glass weakens the bond, so let them dry fully before any glue goes on.
Step 3: Load the glue syringe
Fill the syringe from the E6000 Plus tube by placing the syringe tip inside the tube nozzle, then gently squeezing the tube while pulling back the plunger. This transfers the glue with minimal mess and keeps air exposure to a minimum, so the glue stays workable for longer.
Step 4: Clear any air bubbles
Hold the syringe vertically so any trapped air floats to the opening, then push the plunger slowly until only glue remains. Attach the needle tip and you are ready to apply.
Step 5: Apply glue in small sections
Squeeze a thin layer of glue onto one small section of the glass and let it sit for 5 to 10 minutes until tacky. Less is more here: too much glue runs in unwanted directions on a curved surface. Working in small sections also means you never touch wet glue while turning the flute.
Step 6: Place the crystals
Use the wax picker pen to lift each crystal and press it gently into the tacky glue. Flex between the different sizes in the mix to fill the space with as few gaps as possible: large stones first, then medium and small stones tucked into the spaces between them. We used a scatter embellishment style here, working section by section so every crystal is down before the glue sets.

Top tip: E6000 Plus has a work time of roughly 20 minutes, so only lay down as much glue as you can cover with crystals in that window.
Step 7: Tidy up and cure overnight
Clean any stray glue from the edges with isopropyl alcohol on a cotton bud, then leave the flutes to cure overnight before handling. A full cure is what gives the bond its strength, so resist the urge to box them up early. You'll find the picker pen, sorting tray and glue alongside everything else in our tools and accessories collection.
Why Swarovski crystals for a wedding gift
For a keepsake the couple will bring out on every anniversary, Swarovski's precision cut facets and colour consistency are worth it: the flutes catch candlelight in a way that photographs beautifully. As an Swarovski Authorised Distribution Partner, Bluestreak Crystals supplies the complete genuine range direct from Austria, now available to everyone with no minimum order.
Frequently asked questions
What glue is best for sticking rhinestones to champagne glasses?
E6000 Plus is the best glue for rhinestones on glass. It dries clear, bonds strongly to smooth non porous surfaces and has a work time of around 20 minutes, which gives you enough time to place crystals in each section before it sets. Let the finished glasses cure overnight before handling.
How many Swarovski crystals do I need for two champagne flutes?
Four packs of the Swarovski size mix covers the stem and base of two champagne flutes in a scatter style with crystals placed close together. If you want to cover a larger area or use a single crystal size instead of a mix, our Crystal Calculator will estimate the quantity from the surface area you plan to cover.
Can you wash rhinestone champagne glasses?
Yes, but only by hand. Wash gently in warm soapy water without soaking and never put rhinestone embellished glasses in the dishwasher, as heat and detergent will weaken the glue bond and dull the crystal foiling. Dry with a soft cloth and store them where the crystals will not knock against other glassware.
Is it safe to put crystals on glasses you drink from?
Yes, as long as the crystals stay on the outside of the glass and well away from the rim. Keep the top two to three centimetres of the flute completely clear so lips never touch glue or crystals, and embellish the stem, base and lower bowl instead.
Make it your own
Swap the crystal size mix for a colour that matches the wedding theme, add the couple's initials in crystals on the base, or extend the design up the lower bowl for extra coverage. For more celebration glassware, see our crystal champagne bottle and leopard print champagne flutes projects, or explore the full Craft Studio.


