

To make a crystal reindeer decoration, you pipe a thin layer of glue in small sections, let it turn tacky, then place flatback crystals with a wax picker in concentric lines, starting at the outside edge and working inwards. In this tutorial we cover a reindeer wall decoration with Serinity flatback crystals in Crystal Aurum, around 2,240 stones of warm golden sparkle across three sizes.
Full coverage takes a patient afternoon, but the three-size approach keeps even the antlers crisp, and the finished reindeer becomes a festive showpiece for the wall year after year. Here is everything you need, then the full method.
Project at a glance
- Difficulty: Intermediate, full coverage takes patience
- Time: A few relaxed hours of placing, plus drying
- Crystals used: Serinity flatback rhinestones in Crystal Aurum, SS16, SS12 and SS9
- Technique: Concentric line flatback embellishment, outside edge inwards
What you'll need
Quantities gave full coverage of the reindeer shown, so scale to yours. Add the crystals, glue and tools to your cart from the cards below. The picker, tray and syringe are reusable across every project, so browse the full range of tools and accessories to build your kit.
- Your reindeer decoration, clean and dryAny wall or shelf reindeer works1
- Serinity Rhinestones Non Hotfix SS16, Crystal AurumBroad coverage rows1440
- Serinity Rhinestones Non Hotfix SS12, Crystal AurumTighter curves600
- Serinity Rhinestones Non Hotfix SS9, Crystal AurumAntlers, edges and gaps200
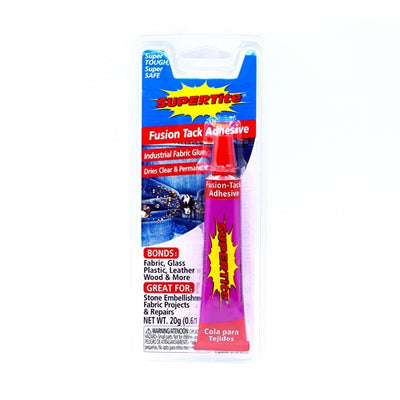
- Supertite Fusion Tack Glue Kit (glue, syringe and tips)Bonding the crystals, dries clear1
- Wax Crystal Picker ToolPicking and placing1
- Magic Sorting TrayHolding the three sizes1
Shop this project
Everything you need for this build. Quantities are a guide, so adjust to your design.

From £3.05 ex VAT

£1.95 ex VAT

£5.12 ex VAT
Not sure how many crystals you need? Use our Crystal Calculator to estimate by surface area.
How to make a crystal reindeer decoration
Step 1: Prepare the surface
Make sure the reindeer is completely clean and dry before you begin. Any grease or dust on the surface will weaken the glue bond.
Step 2: Fill the glue syringe
Remove the plunger from the back of the syringe and slowly squeeze in the Fusion Tack glue so it runs gently down one side without covering the far opening, letting air escape as you fill. Reinsert the plunger carefully; you will feel resistance because the seal needs to be airtight, and it pops into place when properly seated. Only take as much glue as you need.
Step 3: Remove air bubbles
Hold the syringe vertically so the glue slides away from the opening, then gently push the plunger until only glue remains inside. Attach the needle tip and the syringe is ready.
Step 4: Apply a thin layer of glue
Squeeze out a thin layer of glue onto the reindeer and leave it a few minutes to get tacky. Keep the layer thin: too much glue runs in unwanted directions across the curving surface. Work in small sections so you never touch wet glue while handling the decoration.
Step 5: Place the crystals
Tip the three sizes into the Magic Sorting Tray so the stones settle flat side down, then place each crystal with the Wax Crystal Picker Tool in concentric lines, starting from the outside edge and working your way in. Use the SS16 stones across the broad areas and switch down to SS12 and SS9 wherever the shape narrows, especially around the antlers. For a tour of other layouts, see our ultimate guide to rhinestone embellishment.
Step 6: Let the glue dry
Tidy up any drifting glue, then let the reindeer dry for a minimum of 2 hours; drying times vary with how thickly the glue went on. Once dry, your newly blinged reindeer is ready for the wall.
Frequently asked questions
How do you make a crystal reindeer decoration?
Clean the reindeer thoroughly, then work in small sections: pipe a thin layer of glue, let it turn tacky for a few minutes, and place flatback crystals with a wax picker tool in concentric lines, starting at the outside edge and working inwards. Let the glue dry for at least two hours before hanging.
How many rhinestones do I need to cover a reindeer decoration?
Full coverage of the reindeer shown took around 2,240 Serinity crystals in Crystal Aurum: 1,440 in SS16, 600 in SS12 and 200 in SS9. The total depends entirely on the size of your decoration, so measure it first and use the Crystal Calculator on our website to estimate quantities by stone size.
Why use three crystal sizes on one decoration?
Shaped decorations are full of narrowing curves, antlers, ears and edges, that a single large size cannot follow cleanly. The SS16 stones fill the broad areas quickly, while the SS12 and SS9 sizes trace the tighter contours and fill the gaps, keeping the outline of the reindeer crisp.
What glue works on a plastic or resin decoration?
A clear-drying glue such as Supertite Fusion Tack. Apply it in a thin layer so it cannot run across the curved surface, let it turn tacky before placing stones, and allow a minimum of two hours to dry, longer if the glue went on thickly. Any grease or dust weakens the bond, so clean the surface first.
Where do you start when covering a 3D shape with crystals?
Start at the outside edge and work inwards in concentric lines, one small section at a time. Outlining first keeps the silhouette sharp, each new row simply follows the one before it, and small sections mean you never touch wet glue while turning the decoration in your hands.
Make it your own
Crystal Aurum gives a rich gold, but the reindeer looks just as striking in icy Crystal AB or deep red Siam, or pick out the antlers in a contrast colour. For more festive decoration makes, see how to bedazzle a Christmas bauble and make a crystal angel ornament, or explore the full Craft Studio.


