

Want to recreate the dazzling, fully crystallised guitars made famous on Taylor Swift's Eras Tour? This step-by-step guide shows you how to make a rhinestone guitar at home, covering an acoustic guitar in genuine Swarovski crystals for a finish that catches the light from every angle. It is an intermediate project, but with the right glue, tools and a little patience, anyone can do it.
Below you will find everything you need, with quantities, then clear instructions from surface prep to the final polish.
Project at a glance
- Difficulty: Intermediate
- Time: A weekend, roughly 8 to 12 hours of work, plus 24 hours to fully cure
- Crystals used: around 6,250 Swarovski flatbacks across sizes SS5 to SS30
- Best crystal type: Non-hotfix flatbacks (glue-set; hotfix is not suitable for sealed wood)
Watch the tutorial
See this project come together. Watch the full make below, then scroll down for the kit list and step-by-step instructions.
What you'll need
Quantities are for a fully covered acoustic guitar, so scale them to your design. Add everything to your cart from the cards below. The picker and tray are reusable across every project, so browse the full range of tools and accessories to build your kit.
- Guitar of your choiceYour base1
- Swarovski Rhinestones SS5, CrystalFine detail100
- Swarovski Rhinestones SS9, CrystalDetail and blending100
- Swarovski Rhinestones SS16, CrystalMain coverage6,000
- Swarovski Rhinestones SS30, CrystalStatement areas, e.g. the "13"50
- E6000 Plus Glue KitAdhesive1
- Wax Crystal Picker ToolPlacing crystals1
- Magic Sorting TrayOrganising crystals1
Shop this project
Everything you need for this build. Quantities are a guide, so adjust to your design.

£1.95 ex VAT

£5.12 ex VAT
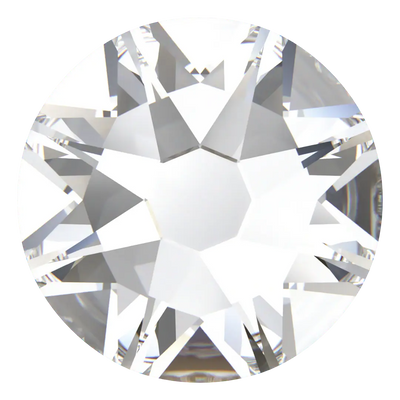

£9.53 ex VAT
Not sure how many crystals you need? Use our Crystal Calculator to estimate by surface area.
How to make a rhinestone guitar
Step 1: Prepare the surface
Make sure your guitar is clean and free of dirt or grease. Wipe it down with a soft cloth and check there are no loose strings or damaged parts in the way. If the surface is glossy, gently buff the area with fine sandpaper until it is matt. This gives the glue a "key" to grip and ensures a strong bond between the surface, the resin glue and your crystals.
Step 2: Apply the glue
Using the applicator from your E6000 Plus Glue Kit, cover a small section of the guitar with a thin, even layer of glue. Allow about 10 minutes for it to become tacky. You will then have roughly an hour of working time on that section before it begins to set, and it will take 24 hours to fully cure. Work in small sections so the glue never dries before you have placed your crystals.
Step 3: Place the crystals
Tip your crystals into the Magic Sorting Tray to keep them organised, then use the Wax Crystal Picker Tool to lift and place each rhinestone. Work in concentric lines, starting at the outer edge of each shape and filling inwards. Outlining first keeps your edges crisp. Leave as little space as possible between crystals for that seamless, fully-covered look, and take care not to obstruct the sound hole or any functional parts of the guitar.
Tip: to pay homage to the Taylor Swift "13" Eras Tour guitar, outline the "13" first in SS30 crystals, then fill the rest of the face in SS16.
Step 4: Let it dry
Work your way across the surface, then leave the guitar lying flat while it dries so the crystals do not slide out of alignment. Leave it overnight before handling, as touching the piece before the glue has cured is the easiest way to knock crystals out of position.
Step 5: Clean and shine
Once the glue is fully cured, wipe the crystals with a soft cloth or tissue to remove any waxy residue left by the picker tool. Then it is time to show it off. Strum with pride and watch the Swarovski crystals catch the light on stage or on camera.
Frequently asked questions
How many rhinestones do I need to cover a guitar?
A fully covered acoustic guitar face uses roughly 6,000 or more SS16 flatbacks as the main coverage, plus smaller quantities of SS5 and SS9 for fine detail and a handful of SS30 for statement areas. It varies with your guitar's size and design, so use our Crystal Calculator to estimate by area before you buy.
What glue works best on a guitar?
An industrial-strength, flexible adhesive such as E6000. It bonds well to lacquered wood and flexes with the instrument rather than cracking. Matt the surface first so the glue has something to grip, and use a flexible adhesive on any instrument that vibrates.
Should I use hotfix or non-hotfix crystals?
Non-hotfix (glue-set) flatbacks. Hotfix crystals rely on heat to activate their adhesive backing, which you cannot apply safely to a sealed wooden guitar, so glue-set non-hotfix crystals are the right choice here.
Can I bedazzle an electric guitar too?
Yes, the method is identical. Just work around the pickups, controls, bridge and output jack, and avoid covering any moving parts or anything you would need to adjust.
Did Taylor Swift's Eras Tour guitar use Swarovski crystals?
Her crystal-covered "13" guitar is the inspiration for this project. We cannot confirm exactly which crystals were used on her instruments, but you can recreate that high-shine, fully-covered look with genuine Swarovski flatbacks.
Will the crystals stay on without damaging the guitar?
With proper surface prep and a flexible adhesive like E6000, the crystals hold up well for display and gentle playing. Heavy gigging will see more wear at contact points, so keep a few spare crystals to touch up over time.
Why crystal your guitar with Swarovski
As an Authorised Swarovski Distribution Partner, Bluestreak Crystals supplies the genuine, full range of Swarovski flatbacks, sourced directly from Austria with consistent batch quality and reliable colour matching, so the crystals you place at the top of your guitar match the ones you finish with months later.
Finished your guitar? For more stage-ready sparkle, see our rhinestone microphone and festival cowprint boots projects, or explore the full Craft Studio.


