

Adding rhinestones to a wedding veil is a simple, budget-friendly way to give it a designer-boutique sparkle for a fraction of the price. This step-by-step guide shows you how to do it safely on delicate tulle using Serinity hotfix crystals and a hotfix applicator tool, with a light scatter design that catches the light without weighing the veil down.
The techniques here apply to any hotfix-on-fabric project, so once you have mastered a veil you can bling almost anything. Here is everything you need, then the full method.
Project at a glance
- Difficulty: Beginner to intermediate
- Time: 1 to 3 hours, depending on how many crystals you place
- Crystals used: Serinity hotfix flatbacks, SS16 Crystal
- Best crystal type: Hotfix (heat-set), applied with a hotfix tool, never an iron
Watch the tutorial
See this project come together. Watch the full make below, then scroll down for the kit list and step-by-step instructions.
What you'll need
Quantities suit a light scatter design, so scale them to your veil and how dense you want it. Add the crystals and tools to your cart from the cards below. The applicator, picker and tray are reusable across every project, so browse the full range of tools and accessories to build your kit.
- Wedding veil of your choiceYour base, usually tulle1
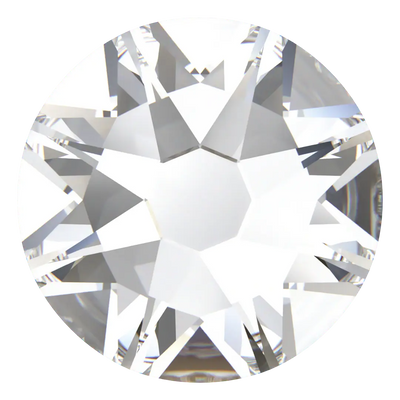
- Serinity Hotfix Flatback Crystals SS16, CrystalThe sparkle1,000
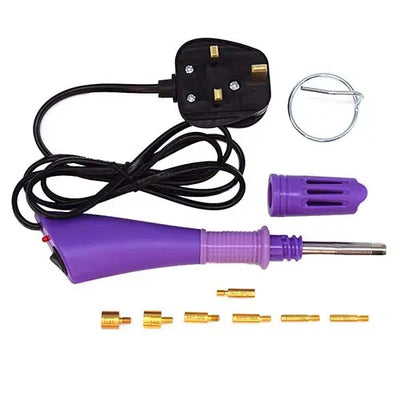
- Hotfix Applicator ToolMelts and sets each crystal1
- Magic Sorting TrayOrganising crystals1
- Wax Crystal Picker ToolPlacing crystals1
Shop this project
Everything you need for this build. Quantities are a guide, so adjust to your design.
£18.99 ex VAT

£1.95 ex VAT

£5.12 ex VAT
Not sure how many crystals you need? Use our Crystal Calculator to estimate by surface area.
How to add rhinestones to a wedding veil
Step 1: Heat the applicator
Turn on the hotfix applicator, rest it on its metal stand and let it heat up, which takes about two minutes. The red light on the handle tells you at a glance when it is on and ready.
Step 2: Protect your surface
Hotfix uses heat, pressure and molten glue that can press through the fabric to the layers beneath. Lay a protective sheet under the section you are working on so nothing sticks to your table or to the layers below. Baking parchment is ideal, but any smooth heatproof surface works.
Step 3: Position the crystals
Tip the crystals into the Magic Sorting Tray, then use the Wax Crystal Picker Tool to lift and place each one glue-side down on the veil, building up your design. Position a small batch before you start heating, so you can check the layout first.
Step 4: Set each crystal with heat
Hold the applicator by its silicone grip and press the hot tip onto a positioned crystal for about 10 seconds. The heat travels down through the crystal and melts the glue on its back into the fabric. Larger crystals need a few seconds longer.
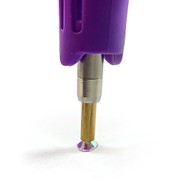
Top tip: most veils are tulle, a very fine fabric that will melt if the metal tip touches it directly. This is exactly why a hotfix applicator, not an iron, is the only safe way to crystal a veil: it heats the crystal, not the fabric around it.
Step 5: Work across the design
Continue across your veil. We used a loose scatter here so light still passes through the tulle and no single area gets heavy. Take care not to touch freshly set crystals, as they stay hot for a few moments after you lift the tool.
Frequently asked questions
Can you put rhinestones on a wedding veil?
Yes, and a scattered crystal design is a beautiful, budget-friendly way to personalise a veil. The key is using hotfix crystals with a hotfix applicator tool, which sets each stone neatly onto delicate tulle without the mess of glue.
Should I use hotfix or non-hotfix crystals on a veil?
Hotfix is best for a sheer veil. The glue is built into the back of the crystal and melts cleanly into the fabric, so there is no visible adhesive on see-through tulle. Non-hotfix glue can leave marks on such fine fabric.
Can I use an iron instead of a hotfix applicator?
No. An iron applies too much heat over too wide an area and will melt or scorch fine tulle, and it gives you no precision. A hotfix applicator heats only the single crystal you are setting, which is why it is the safe tool for a veil.
Will hotfix crystals damage delicate veil fabric?
Not if you work carefully. Place a protective sheet such as baking parchment under the fabric, touch the hot tip to the crystal only and never to the tulle, and hold it just long enough to melt the glue. Precision is what protects the veil.
How many crystals do I need for a veil?
It depends on the veil size and how dense you want the design. A light scatter like the one here used around 1,000 SS16 crystals, which keeps the veil light and lets the light through. Use our Crystal Calculator to plan denser designs.
Which crystals should I use?
We used Austrian-made Serinity hotfix crystals here for a high-quality finish. You can step up to premium Swarovski hotfix or down to budget Estella. Whichever you choose, hotfix is the format you want for a veil.
Make it your own
A scatter is the most popular look, but you can also concentrate crystals along the edge, gradate them from dense at the hem to sparse at the top, or pick a subtle colour. Planning the rest of your bridal look? See our guides to embellishing bridal shoes and making a wedding fascinator. Explore more makes in the Craft Studio, and if you are new to hotfix, order a sample to practise on a fabric offcut first.


