
Adding rhinestones to a pair of shoes is one of the easiest ways to turn an everyday pair into something special, and you do not need boutique prices to do it. This step-by-step guide shows you how, using Preciosa flatback crystals in Gold Quartz AB and E6000 Plus glue, with a neat toe design you can adapt to heels, flats or sandals.
It is a beginner-friendly project, and the same method works on almost any shoe. If you are after a full statement heel design in particular, see our dedicated guide to bedazzling high heels. Otherwise, here is everything you need, then the full method.
Project at a glance
- Difficulty: Beginner
- Time: 1 to 2 hours, plus overnight to cure
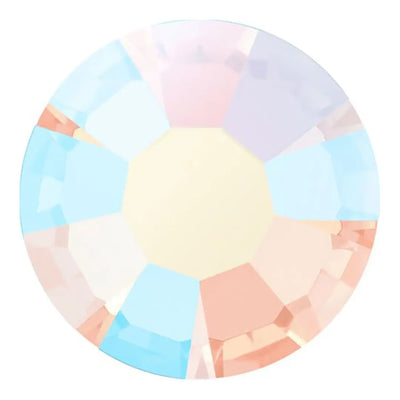
- Crystals used: Preciosa flatbacks, SS10 Gold Quartz AB
- Best crystal type: Non-hotfix flatbacks, glue-set to the shoe
What you'll need
Quantities suit a toe or accent design, so scale them to your shoes and coverage. Add the crystals, glue and tools to your cart from the cards below.
- Shoes of your choiceYour base, clean and dry1 pair
- Preciosa Rhinestones SS10, Gold Quartz ABThe sparkle800
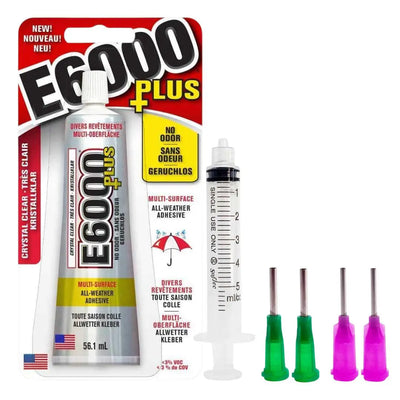
- E6000 Plus Glue KitAdhesive with syringe1
- Wax Crystal Picker ToolPlacing crystals1
- Magic Sorting TrayOrganising crystals1
Shop this project
Everything you need for this build. Quantities are a guide, so adjust to your design.
£9.53 Excl. VAT

£1.95 Excl. VAT

£5.12 Excl. VAT
Not sure how many crystals you need? Use our Crystal Calculator to estimate by surface area.
How to add rhinestones to shoes
Step 1: Prepare the shoe
Make sure the area you are embellishing is clean and dry. If the surface is shiny, lightly sand it first so the glue has a key to grip. You can skip the sanding if the surface already has texture.
Step 2: Load the glue syringe
Fill the syringe with only as much E6000 Plus as you need. The tidiest way is to remove the needle tip, put the open end of the syringe over the nozzle of the glue tube, then pull the syringe plunger while gently squeezing the tube. This transfers the glue with minimal mess and air exposure.
Step 3: Clear the air bubble
You will usually have a small air bubble in the syringe. Hold it upright so the bubble floats to the top, then gently push the plunger to expel the air until only glue remains. Twist the needle tip back on and the syringe is ready.
Step 4: Apply the glue
Squeeze a thin layer of glue onto the shoe and leave it 5 to 10 minutes to get tacky. Apply sparingly: too much glue runs on the curved surface of a shoe, and its honey-like consistency squeezes up between the stones and stops you packing them tightly.
Step 5: Place the crystals
Use the Wax Crystal Picker Tool to set the Gold Quartz AB crystals into the glue in your chosen style. For this design we worked in concentric lines from the top edge of the toe down towards the tip, one line at a time, until we ran out of space.
Step 6: Cure overnight
Tidy any stray glue at the edges and leave the shoe to dry overnight. While the first shoe cures, crystal the second so the pair is ready together.
Frequently asked questions
How do you put rhinestones on shoes?
Clean and dry the area first, apply a thin layer of strong flexible glue, then place each crystal with a wax picker tool and leave the shoes to cure. Work in small sections so the glue stays tacky while you position the stones.
What glue works best for rhinestones on shoes?
It depends on the material. Smooth, synthetic and leather shoes grip well with E6000, while fabric and suede do better with a flexible fabric glue. Whatever you use, the surface must be clean and dry, and a light sand helps very glossy shoes.
How many crystals do I need to bedazzle shoes?
An accent or toe design like the one here uses around 800 SS10 stones across a pair, while full coverage needs considerably more. Use our Crystal Calculator to estimate by area before you buy.
Will the rhinestones stay on my shoes?
Shoes flex and take knocks, so press each stone firmly into a strong flexible glue and let them cure overnight before wearing. Keep a few spare crystals to replace the occasional one that works loose over time.
Can I bedazzle any type of shoe?
Yes, from heels and flats to sandals and trainers. The method is the same; you just match the glue to the material. For a full statement heel design specifically, see our guide to bedazzling high heels.
Which crystals should I use?
We used Czech-made Preciosa in Gold Quartz AB here for a warm golden sparkle. You can also choose premium Swarovski, our own Austrian-made Serinity, or budget Estella, depending on the finish you are after.
Make it your own
A toe design is just the start. Try the heel, the straps, the back, or a full gradient, and pick a colour to match an outfit. For more makes, explore the Craft Studio, and if you are new to crystals, order a sample to check colours in person first.


