

To bedazzle a handbag, you clean and lightly key the surface, apply a flexible resin glue in small sections, then place flatback rhinestones one by one with a wax picker, starting with the outline and working inwards. In this tutorial we transform a red lips handbag using Serinity flatback crystals in three shades of red, around 2,150 stones in SS16 with SS7 for the gaps.
The same method works on almost any bag, from clutches to totes, and the finished embellishment is waterproof once fully cured. Here is everything you need, then the full method.
Project at a glance
- Difficulty: Beginner friendly, just a little patience for the placing
- Time: An afternoon of placing, plus overnight curing
- Crystals used: Serinity flatback rhinestones in Siam, Light Siam and Padparadscha
- Technique: Flatback embellishment with resin glue and a wax picker
Watch the tutorial
See this project come together. Watch the full make below, then scroll down for the kit list and step-by-step instructions.
What you'll need
Quantities suit the lips design shown, so scale them to your bag and coverage. Add the crystals, glue and tools to your cart from the cards below. The picker, tray and syringe are reusable across every project, so browse the full range of tools and accessories to build your kit.
- Your bag, clean and dryWe used a red lips handbag1
- Serinity Rhinestones Non Hotfix SS16, SiamLip shadows500
- Serinity Rhinestones Non Hotfix SS16, Light SiamMain lip colour1000
- Serinity Rhinestones Non Hotfix SS16, PadparadschaHighlights500
- Serinity Rhinestones Non Hotfix SS7, all three coloursFilling small gaps50 each
- E6000 Plus Glue Kit (glue, syringe and fine tips)Bonding the crystals1
- Wax Crystal Picker ToolPicking and placing1
- Magic Sorting TrayOrganising crystal colours1
Shop this project
Everything you need for this build. Quantities are a guide, so adjust to your design.
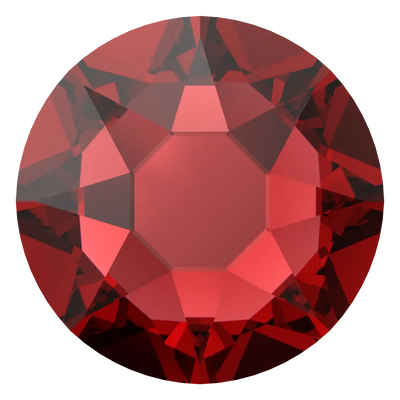

From £2.12 ex VAT

£1.95 ex VAT

£9.53 ex VAT
Not sure how many crystals you need? Use our Crystal Calculator to estimate by surface area.
How to bedazzle a handbag
Step 1: Prepare your workspace
Set up on a large, flat, well-lit surface with your tools within easy reach. You will be leaving the bag to cure overnight, so choose a spot where it can sit undisturbed.
Step 2: Prep the surface of the bag
Make sure the bag is clean and free of dirt or grease. If the surface is shiny, gently buff the area you are embellishing with fine sandpaper until it turns matt. This creates a key for the glue to grip, giving a far stronger bond between the resin and the crystals.
Step 3: Fill the glue syringe
Place the end of the syringe inside the nozzle of the E6000 Plus tube, then pull the plunger while gently squeezing the tube. The glue transfers with minimal mess and minimal exposure to air. Only take as much as you need for the session.
Step 4: Remove air bubbles
Hold the syringe vertically so the glue slides away from the opening, then gently push the plunger until only glue remains inside. Attach the fine needle tip and the syringe is ready.
Step 5: Apply the glue
Pipe a thin line of glue around the outside border of your design. Allow 10 minutes for it to turn tacky. Each glued section gives you roughly one hour of working time before it starts to set, and the bond takes 24 hours to fully cure.
Step 6: Place the crystals
Tip each colour into the Magic Sorting Tray so the stones sit flat side down, then pick and place them with the Wax Crystal Picker Tool in concentric lines, beginning at the outer edge. Outlining first and working inwards guarantees clean edges. For the lips design, use Siam for the shadows, Light Siam as the main colour and Padparadscha for the highlights. Towards the end you will find small gaps the SS16 stones cannot fill, so finish these with the SS7 rhinestones.
If you would like to watch the full embellishment from start to finish, with tips along the way, the video tutorial is here:
Step 7: Let the glue cure
Leave the bag flat overnight. Once fully cured the bond is waterproof, so your crystals will stay put even if you are caught out in bad weather.
Frequently asked questions
How do you bedazzle a handbag?
Clean the bag and lightly buff any glossy areas so the glue can grip, apply a thin line of flexible resin glue in small sections, then place each rhinestone with a wax picker tool, starting with the outline and working inwards. Leave the bag flat and undisturbed for 24 hours to fully cure.
What glue is best for rhinestones on a handbag?
A flexible industrial-strength resin glue such as E6000 Plus works best on handbags. It bonds to leather, faux leather and most synthetic surfaces, stays slightly flexible so crystals do not pop off when the bag moves, and is waterproof once fully cured. Apply it with a fine-tip syringe for clean, controlled lines.
How many rhinestones do I need to cover a handbag?
This red lips design uses around 2,150 Serinity crystals: roughly 2,000 in SS16 across three shades of red, plus 150 in SS7 to fill the small gaps. Quantities depend on the area you cover and the stone size you choose, so measure your design first and use the Crystal Calculator on our website to estimate how many you need.
Will rhinestones fall off my bag in the rain?
Not once the glue has fully cured. E6000 Plus is waterproof after 24 hours, so a properly prepared and glued embellishment will survive rain and everyday wear. Avoid soaking the bag or machine washing it, and spot clean around the crystals instead.
Can you put rhinestones on a leather or faux leather bag?
Yes. Both take rhinestones well as long as the surface is clean, dry and free of grease. If the finish is shiny, gently buff it with fine sandpaper first to create a key for the glue, which gives the bond far more grip than sticking to a gloss coating.
Make it your own
The lips motif works in any palette: try icy whites and silvers for winter, or swap the reds for soft pinks. For more bag makes, see how to bedazzle a crystal clutch bag, a rhinestone beach bag or a crystal passport case, or explore the full Craft Studio.


