Your Cart is Empty

Which Crystals Are Best for Nail Art?


When it comes to nail art, there's no denying that adding a touch of sparkle can make a world of difference. With the variety of crystals available in the market, you might be wondering which are the best crystals for nails. In the following blog post, we’re going to guide you through selecting the perfect crystal embellishments for your nail art, and show you how to apply them easily and seamlessly for the perfect glitzy manicure! Let’s take a look.
Why add crystals to nail art?
Adding crystals to nail art can instantly elevate a simple design, turning a simple manicure from a cute finishing touch into an eye-turning fashion accessory. When it comes to special events like weddings or parties, crystals on nails can even serve as a statement piece, and look amazing when caught on the flash of a photographer’s camera.
Which crystals are best for nail art?
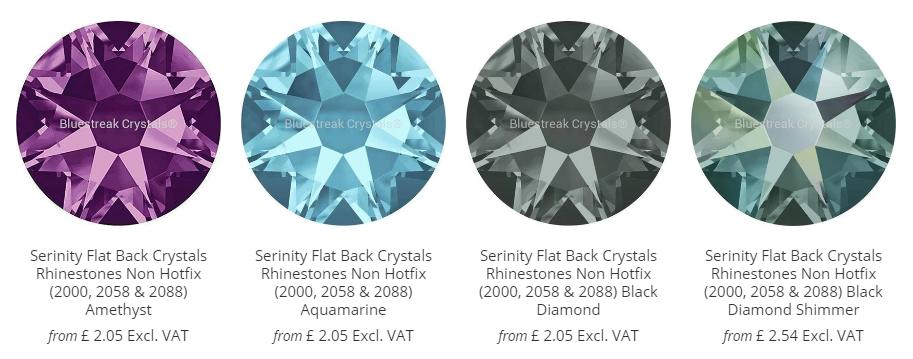
While you might think that Swarovski crystals are your best bet for your nail art, we raise you Serinity crystals! Serinity crystals are the best nail rhinestones if you’re looking to add a touch of luxury sparkle, and are just as refractive and gorgeous as Swarovski crystals. Plus, unlike Swarovksi crystals, you can use Serinity crystals for all your personal craft projects (we’ll discuss this in greater detail further on in this blog).
Don’t forget that non Hotfix Rhinestones should be your choice when it comes to the best nail rhinestones, not Hotfix flatbacks. Non Hotfix flat-backed crystals don’t require heat to be applied, and can be applied to acrylics or natural nails using some basic nail glue.
What size crystals are best for nail art?
The average human nail is typically up to 1 inch in length, and this affects the size of the crystals you will choose. The most popular sizes for Serinity Rhinestones in nail art are SS3 – SS5 because they are so small you can fit a good number of them onto the nail, giving you maximum sparkle in the available space.
Serinity Crystal Shapes that are tapered at one end lend themselves to almond and stiletto styles of nails nicely and we know many famous nail technicians stock up on a few key shapes frequently. These include the 2304 Raindrop by Serinity, which shares an uncanny resemblance to the now heavily policed Swarovski Crystal of the same style. The 2205 Flame and the 2201 Marquise crystal shapes are also extremely popular because their measurements will fit on the average nail.
One thing to always remember, is you want specifically flatback crystals if you are applying the crystals yourself, professionals have the necessary mediums and powders to build the base required to set fancy stones and chatons securely. But with some nail glue and a few high-quality Serinity Rhinestones, this stylish status symbol can be achieved by anyone who truly wants to shine.
Swarovski crystals for nails
So, you might be wondering - can I use Swarovski Crystals for nail art? It’s true that Swarovski are known for their unparalleled sparkle, making them a popular choice for those looking to add a touch of luxury to their nails. However, due to Swarovki’s recent purchase policy change in 2020, you can no longer buy Swarovski crystals unless they’re going to be used as physical, sellable product.
In the case of nails, you could sell sets of false or acrylic nails embellished with Swarovski crystals, but you wouldn’t be able to buy them for use as a manicurist. Similarly, you wouldn’t be able to purchase Swarovski crystals for personal use, which is why we recommend Serinity Crystals as the best rhinestones for nails if you’re looking to jazz up your next at-home manicure.
How to apply crystals to nails
So, when it comes to applying crystals on nails, how easy is it to get your sparkle on? The good news is, it’s actually a pretty straightforward process, and not unlike the process used for many other forms of nail art. Here’s how to apply crystals on nails or acrylics:
Prep your nails
Start by cleaning and shaping your nails as you would during a regular manicure; buff, file, and push back your cuticles if you’re going to be applying acrylics. Then, apply a base coat and allow it to dry completely.
Apply the nail polish or gel color
Choose a color that complements the crystals you've selected, and apply one or two coats of nail polish or gel color, and let it dry.
Choose the right adhesive
For regular nail polish, you can use nail glue or a clear top coat to adhere the crystals. For gel polish, use a gel top coat or a special gel adhesive designed for crystals.
Pick up the crystals
Using a crystal wand or a pair of tweezers, pick up the crystals one at a time. If you’re going to be using different colours, we recommend placing them on magical trays to keep them from getting mixed up or falling off the table.
Apply the adhesive
If using nail glue, dab a small amount onto the back of the crystal. For gel polish, apply a small dot of gel adhesive or gel top coat where you want to place the crystal on the nail.
Place the crystals
Gently press the crystal onto the nail, making sure it's in the desired position. Repeat this process for each crystal until you have achieved your desired design.
Seal the crystals
For regular nail polish, apply a clear top coat around the edges of the crystals, being careful not to cover them. For gel polish, apply a thin layer of gel top coat around the crystals, and cure under an LED or UV lamp.
Clean up
If necessary, use a small brush dipped in nail polish remover or acetone to clean up any excess adhesive around the crystals. Finally, finish with a final top coat to seal and protect your nail art, and you’re ready to sparkle!
Check out our most popular Serinity Flatback Rhinestones Crystals