Your Cart is Empty

Ultimate Guide To Rhinestones Embellishment

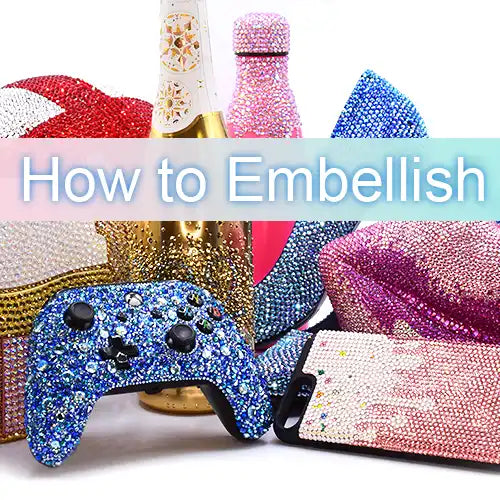
Welcome to the wonderful world of crystal bedazzlement! You have an item, maybe an accessory, ornament or garment and you want to transform it into a glistening masterpiece, and you’ve decided to crystallise it yourself. Maybe you are completely new to the craft, or are an experienced embellisher who wishes to compare notes on the finer details of technique; either way this guide will take you through the process of rhinestones embellishment from preparation through to finished result and aftercare. We will show you the different ways you could choose to place the rhinestones on your surface in order to achieve the best glistening results and hopefully inspire you to pick up that picker pen and get blinging yourself!
Preparation
Like with all craft skills, you are going to require a workspace that is optimised for careful, tidy work, in order to achieve the best possible results. You wouldn’t try to embellish a handbag while standing on a train during rush hour for example! Ensure you have a steady flat surface that is both even and at a comfortable working height. You will then need enough clear space to be able fit the object you are embellishing, plus all your tools and room to manoeuvre. You might be surprised how much space you will need once the process gets going! One of the truest joys of embellishing is the therapeutic Zen like state you can find yourself in when zoned into the details. So, allow yourself enough time to be able to avoid rushing and have as few distractions as possible, background music however is encouraged!

When you’re enthusiastic to get started it is easy to jump ahead to sparkly stages, however it is vitally important that the surface itself, is completely clear of grease, stray pieces of mysterious fluff that inevitably appear out of nowhere and dust. Once that glue is on and set completely clear, anything that was on that surface at the start is now permanent, like a mosquito trapped in prehistoric amber, you will notice it and be haunted by it. In addition to a clean surface, if your item is going to be handled a lot or washed frequently like a drinks bottle or tumbler, it is advised that you lightly sand the surface down first, so that there is a rough texture for the resin glue to grip to. This will maximise the chances of the rhinestones staying securely fixed in place for the longest possible time.
Rhinestones / Flat Back Crystals
The next big decision is the rhinestones you choose to use and there are many types out there, here are a few popular options to consider. Classic Crystal (Foiled) means the glass is completely colourless, therefore you can see straight through to the silver foiling on the back. When a coloured crystal has no effect in or on it, it is the standard version of that colour. Crystal AB has an iridescent coating that covers the top of the crystal, which shimmers like the rainbow and this effect can be found as alternate versions of most colours. There are several crystals that have a chrome metallic finish over them, which is great for when you want everything to look gilded like actual gold instead of gold coloured glass crystal. Lacquered crystals are unique because they have a layer of coloured lacquer on the back instead of silver foiling, which gives a bold, solid colour. For more detail regarding crystals effects, plus handy comparisons between the brands, take a look at our article titled Crystal Effects.
Glue
One of our most frequently asked questions is “what glue do I need?” and we understand that when there are so many confusingly specialised glue options out there, it’s easy to end up worrying that you’ve picked the wrong one. So here’s a brief overview of the most frequently used glues for the application of non hotfix flat back rhinestones.
Gem-Tac is a strong Tacky Glue that every crafter should keep in their kit and is perfect for rhinestone embellishment and jewellery repair. Please note that Tacky glue is usually water based so it is best for items that you do not plan to wash or put outside. Ninja SuperTite Fusion Tack Adhesive is an industrial grade fabric glue that works well on fabric along with glass, plastic, leather and wood. CG500 is a Resin Glue which is perfect for hard wearing, frequently used items and comes in two tubes; one containing Epoxy Resin and the other Hardener, which you mix to get a water resistant glue. For more information on different types of glue and what projects they are best suited to, we recommend reading our related blog titled Which glue is best for your embellishment project.
Tools
For an efficient and enjoyable rhinestone embellishment experience you are going to require a few key tools designed for the task. So before you get blinging, make sure you have the basics; there are two tools that are considered essential. The Doubled Ended Picker Pen has a wax tip, making it the perfect way to effectively pick up and place your crystals without having to fight with tweezers, the other end of the pen has a precision metal tip for nudging the crystals around once they are placed on the glue. You also need a safe place to keep your loose crystals while you are embellishing and the Magic Sorting Tray not only holds your crystals, but also has an inbuilt texture that flips the crystals the right way up when you shake it- just like magic!
If you are embellishing onto fabric we recommend specifically "Hotfix" flat back crystals, because they have a layer of glue on the back that reacts to heat and is designed for fabric. Please be aware that if it doesn’t state “Hotfix” in the product description, you will need a separate Fabric Glue. When bedazzling with Hotfix Crystals you need heat to activate the glue, for this we recommend the BeJeweler Pro Hotfix Tool. This handheld heat tool has a comfortable silicon handle and provides a specific point of heat, similar to a pyrography pen or a soldering iron, which is perfect for doing detailed Hotfix designs. It comes with a selection of tip sizes and a little stand that keeps the hot tip safely up away from the table surface. For a more in depth look at the hotfix process please enjoy our blog titled A finishing touch with Preciosa Hotfix Crystals.
Ready To Get Started
You have now selected your perfect rhinestones and your craft tools are laid out ready in your appropriate workspace; now it’s time to start placing your crystals! The one question left is, “Which rhinestone embellishment technique to use?” and maybe you find yourself staring at the blank surface in front of you, unsure about the best way to approach those odd angles and asymmetrical shapes. At Bluestreak Crystals we like to call this “Blingers Block” and we have done many experiments to establish the best techniques, here is what we have learned.
Straight Line / Grid Style
The simplest approach to filling a space is with straight parallel lines and the most frequently used crystal shape is round, therefore imagine rows and rows of circles, all lined up so that the widest edge of each diameter touches. The desired result of this method is one of smoothly flowing lines that complement the shape of the item.
In a square or rectangle, this method builds up to look like a perfect grid and you would start at the top or edge furthest away from you and work your way across. This small jewellery box is a great example.

If you are filling a circular space, it might be preferable to modify this approach into concentric circles, starting with the outer edge and working your way in or vice versa, this will resemble the rings in a tree. We used this method to cover a teapot and the timelapse video on our social media channels show how the rings of crystals gradually cover the space.
For best results on an irregular shape, you begin with the outlines first and then neatly work your way in, following the flow of the shape and maintaining even spacing as much as possible. Eventually your rows of crystals will meet in the middle in various places and you will naturally end up with a few remaining gaps. You can fill these in with whatever size crystal most neatly fills the space with minimal disruption to the flow.

There is a handy trick you can use when you have a small gap left at the end of your row of rhinestones, which is less than half the size of the crystals you are using. Instead of filling that gap with a smaller crystal that will stand out as different to every other crystal in that row, you can nudge the last 5 crystals along ever so slightly, so that there is a tiny gap between each of them. This spreads the last few crystals out, just enough, to reach the end of the line in a way that is not noticeable unless you are looking very closely indeed. If the gap is larger than half a crystals worth, then we recommend you leave the gap as it is and fill it with a slightly smaller crystal that will be less obviously different.
Honeycomb Style
This style also uses straight lines however, it is more tightly packed and is best for when you want a completely solid surface of satisfying sparkle with no visible gaps between the rhinestones. This method begins with a straight row just like the previous techniques, but this time the second row will nestle into the spaces between the crystals of the previous line. This creates the iconic honeycomb effect and is great for straight shapes with 90-degree angles, like squares and rectangles. One thing to bear in mind when using Honeycomb is that the edges on either side of your block of crystals are going to look like a zig-zag because vertically they are deliberately out of alignment. If you want to achieve straight side edges you will need to fill these gaps with a smaller size of crystal, typically half the size of the stones you have been using for the majority of the design. A great example of the honeycomb effect can be seen on this striped purse:

If you choose to use Honeycomb on a shape that is in anyway irregular, you will find that at various points the honeycomb will no longer line up as it should, and you may have to improvise with the occasional smaller rhinestone to maintain the flow. In some cases, you can successfully hide these scattered irregularities in the overall spectacle of the finished sparkling object, as long as they are spread out in such a way that the eye does not register them at first glance. If your shape is irregular however, we recommend using either concentric lines that are allowed to shift in and out of alignment or use the next method which is completely different.
Scatter Style
This is by far the most versatile method because it will fit into any shape regardless of how challenging the angles are. Scatter style does this by using a variety of rhinestone sizes and by being deliberately random in nature, you simply select whichever size crystal fits into the space that needs filling and you place your crystals as tightly together as you can. This makes scatter a very forgiving technique and is also great for tightly curved surfaces because you can drop down in size when you need to fit the crystals into a tight corner and expand back up into the larger crystal sizes when you once again have space to do so. Given there are no strict rules when it comes to a “good” scatter it’s better to apply principles and continue to keep an eye on how well balanced your embellishment appears as you go along. For example it is best to avoid having all of your larger crystals clustered on one side and not the other, a way to guard against this to aim for having no two crystals of the same size sat directly next to each other. The sizes most frequently used for this method are usually between SS3 and SS20 and a selection of at least five sizes gives a good flexibility. You can also incorporate rhinestone shapes into the scatter style easily and are a great way to add interest to the final look, we would recommend choosing larger shapes when doing this so that the shapes are more guaranteed to stand out in the gloriously chaotic blend of sizes (and colours if you so choose.)

Scatter is also our preferred method when achieving an ombre or sunburst effect with crystals. Ombre is defined by being all one solid colour at one end, and then transitioning gradually into a completely different colour at the other end. When using crystals this could mean blending two colours or it could mean having full crystal coverage in one area and that fading out to flat surface with no crystals in another. The intrinsic randomness of the scatter style makes it easy to allow the crystals to become increasingly spaced out and smaller in size, giving the impression of fading to nothing. If you are blending colours you could also achieve ombre with straight lines or honeycomb. The geometric nature of those methods will result in an almost pixilated effect, reminiscent of the 16 bit graphics that fans of retro games will remember fondly.
Final Touches
Once your rhinestones are all in place and the glue is fully dry, the final thing to do is give the crystallised surface a wipe down with a dry cloth to remove any traces of wax that might have stuck to the crystals as a result of picking them up with the wax tip of the picker pen and then you’re done! If your crystals are on fabric, we strongly recommend gentle, cool washes only and turning the garment inside out if it’s being put into the mashing machine, as this lowers the risk of crystals being rubbed by friction with other surfaces.
As with all things, wear and tear over time will have an effect on both the item and the crystals that are now attached to it. Even the strongest of glues and most perfectly applied techniques can eventually be conquered by time and the process of living an active and fabulous life, but these crystallised items are meant to be adored, used and be seen in! So it’s a good idea to keep a little stash of sparkle tucked away in your craft kit for those potentially rainy days and if you ever want to refresh your supply or embark on even bigger and better embellishment projects we hope you’ll continue to choose us at Bluestreak Crystals.